|
|
|
Feb 23, 2023 16:44:07 GMT
|
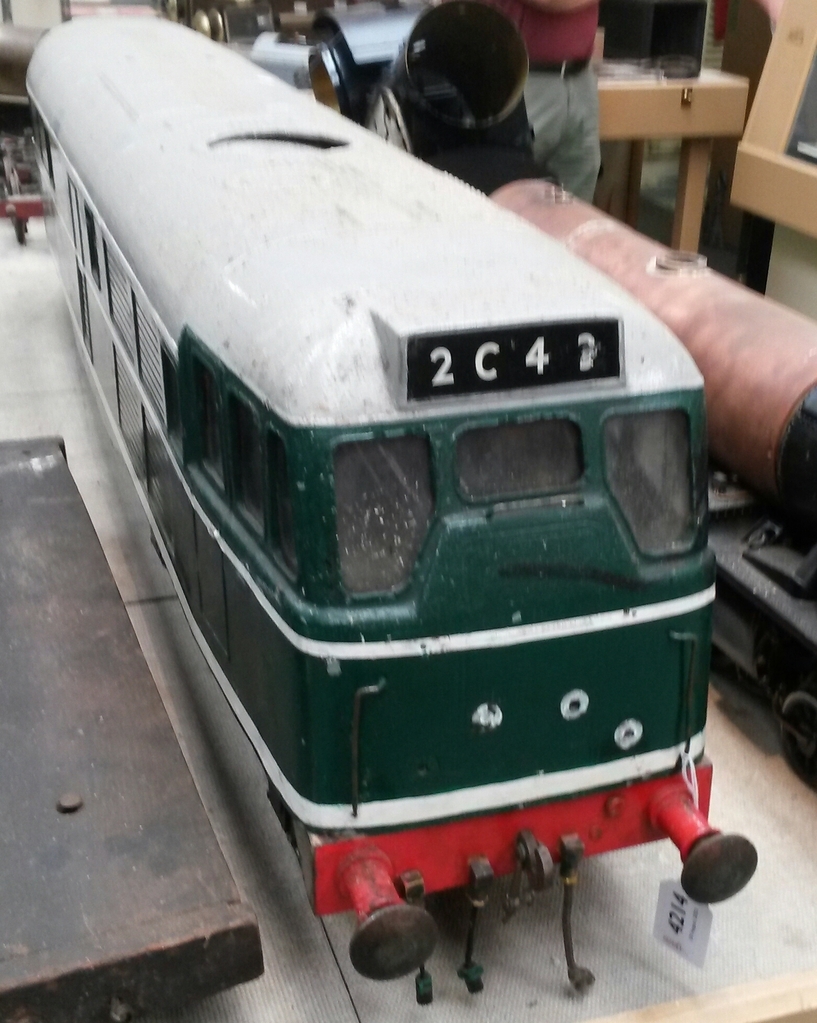
And now for something completely different! This all started over 12 months ago with me attending a Railwayana auction. Part of the lots were large scale model trains and locomotives (by large scale, I mean 3.5" gauge track upwards). One caught my eye; a 5" gauge (1:11.3 scale) Compass House Class 30/31 battery powered diesel locomotive along with a 'box of bits'. Suffice to say it didn't reach reserve and I couldn't warrant spending what it stopped at, so I left well alone... At the next auction, I'd been given a shopping list by a mate who saw some interesting stuff in the catalogue - but sat next to a 5" gauge model of Flying Scotsman, was the CH 31 again. Hmmmm.... Suffice to say a more realistic value had been placed on it and after a few nervous moments, I'd bagged it! Now to hide it from SWMBO......
I resorted to the old "Oh THAT! It's been under that blanket for ages, don't you remember?" trick - maybe that only works for women with shoes and dresses...? Anyway, it resided in the garage on the floor for a few weeks until I finally decided that maybe I should actually have a look at it and do something with it. Now before I go any further, I need to give you an idea of the size of this thing.... it is at 26.5mm/1ft scale (although I work to 25.4mm/1ft as its easier and curse word all difference in this scale), which is basically 1/12(ish). That makes it (in English) 12.5" high, 9" wide and 56" long. In other words - a lump. It has a moulded fibreglass one-piece bodyshell, 19mm angle-iron chassis, laser cut steel bogies, four 160W traction motors, full suspension, a 4QD controller and handset and needs 2 x 063 car battreies to power it. As I said, a lump. So, thinks I, I'll just get it going and see what happens......
 |
| |
Last Edit: Feb 27, 2023 16:36:10 GMT by marinanut1
|
|
|
|
|
|
|
Feb 27, 2023 16:45:29 GMT
|
Now the paint on this thing was horrible; applied with a chair leg from 50 yds away and there were some interesting 'additions' and holes all over the bodyshell. One of the first things I did, though, was price up some proper oval-headed sprung buffers - OUCH! Big size, big prices.... Hmmm... After some measuring up, I worked out how large the heads needed to be and drew up a simple card shape. I then found some 3mm steel and cut two heads out from it, dismantled the existing buffers and bonded the new heads on. That was an immediate improvement! 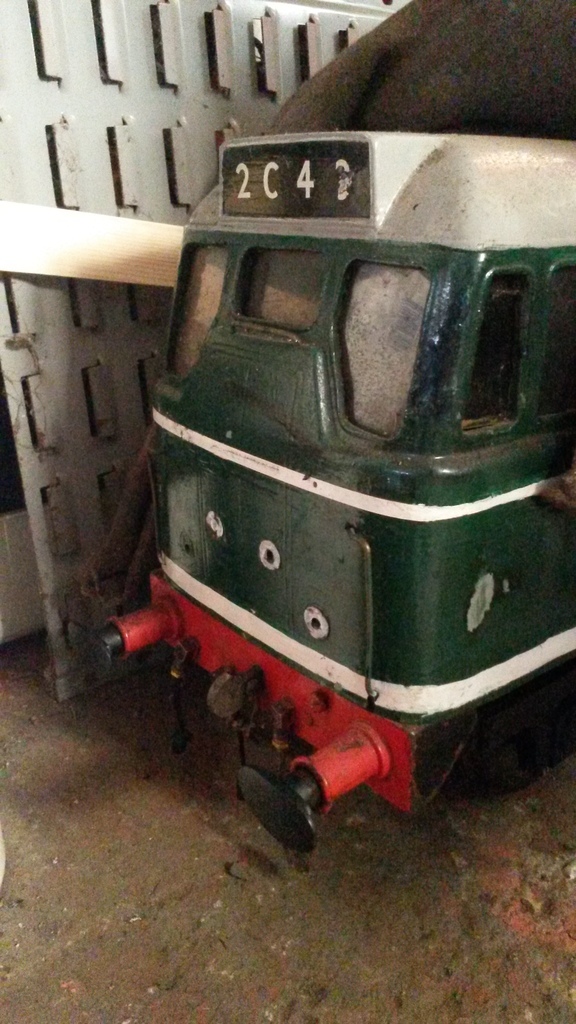 Next on the plan or action was to start sorting the paint out. Well... it was either stuck to the fibreglass shell so well a nuclear strike wouldn't shift it or peeled off in sheets. So out came the detail sander with a pile of abrasive pads and away I went... 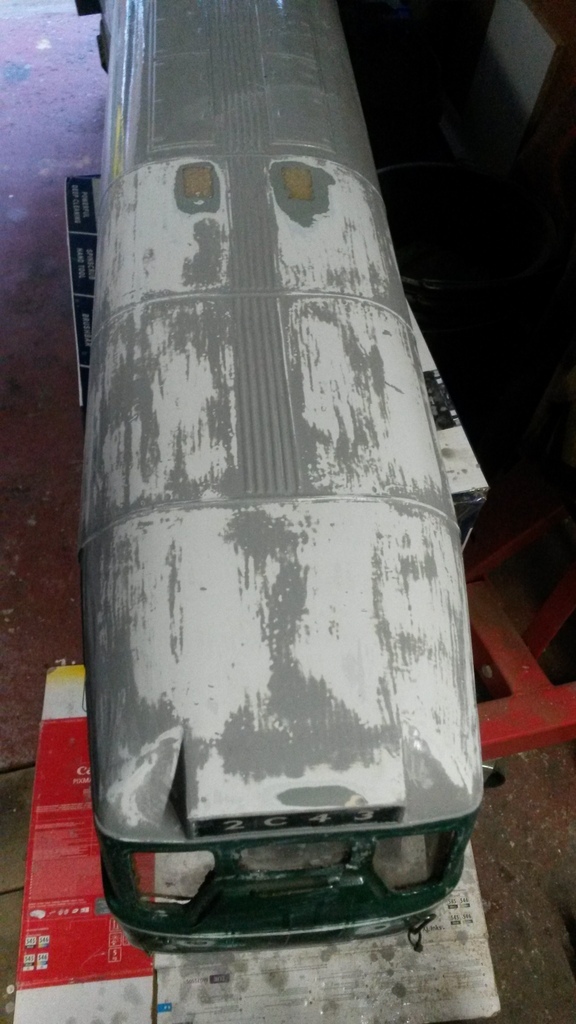 |
| |
|
|
|
|
|
Feb 27, 2023 16:52:25 GMT
|
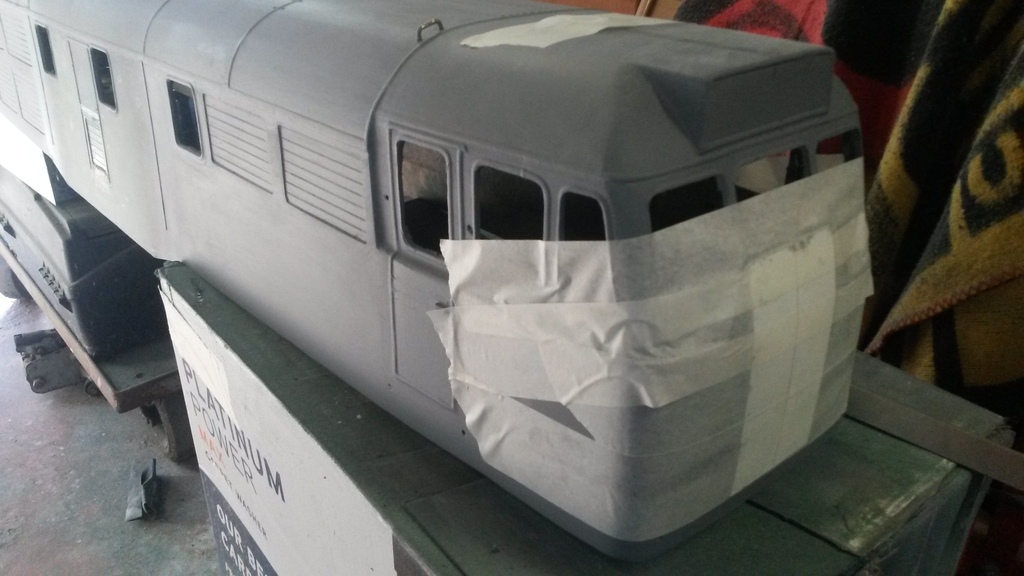
I worked my way around each cabside and the roof in turn. Each cab had a 'crease' below the window that isn't on the real thing so once the paint was off, I filled it with car filler, then sanded back and primered it. This is where the original plan started to unravel....  The crease... 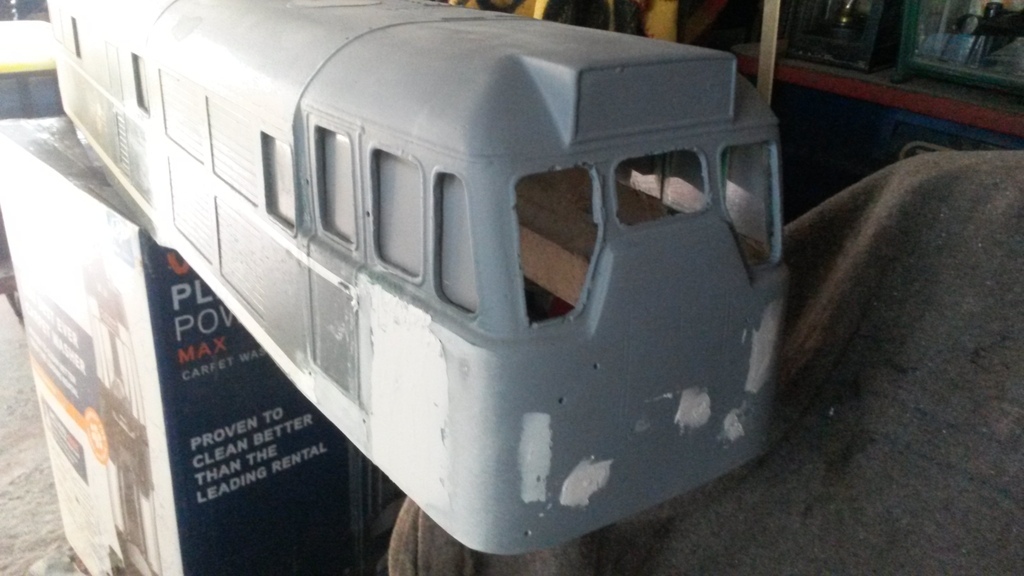 Filled and prepped 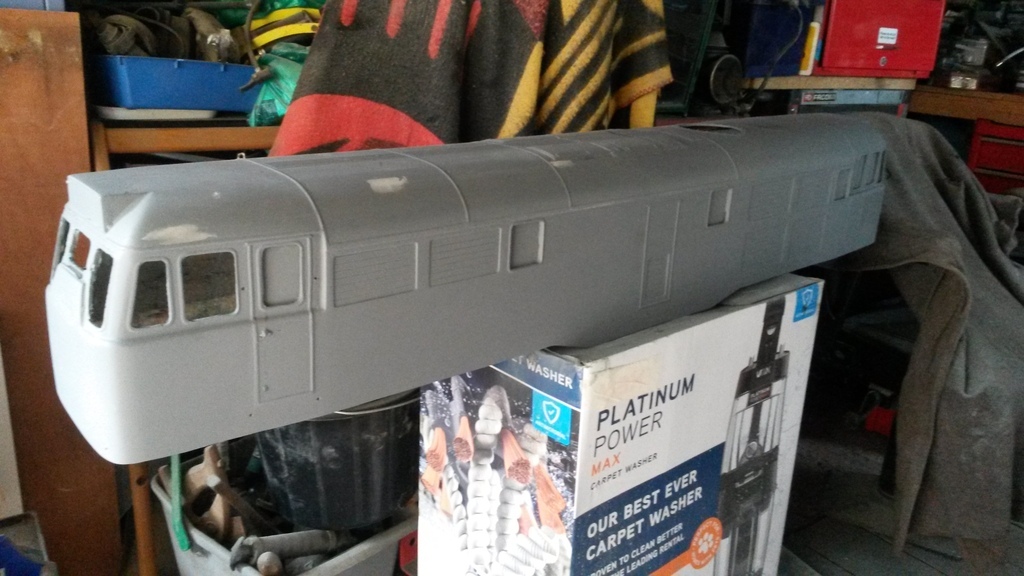 De-painted and primed. Now, this looked more like a refurbished Class 31 than the original style of loco, as they had a lot of the fiddly bits 'deleted' and far cleaner lines. A new plan started to form... |
| |
|
|
|
|
|
Mar 21, 2023 20:09:22 GMT
|
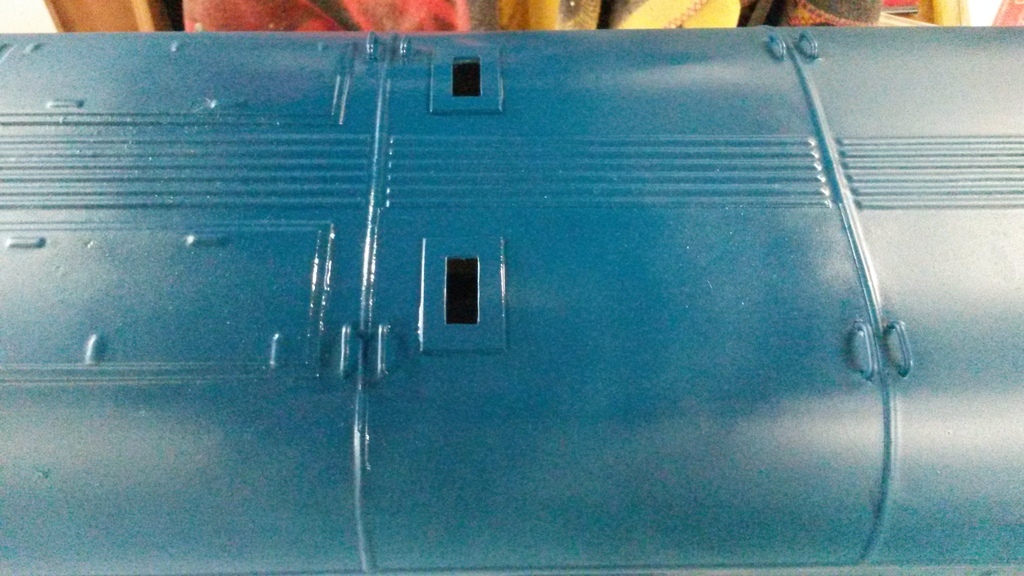
 So, having decided to 'update' the loco, I filled the footsteps and boiler water tank filler and smoothed it over. 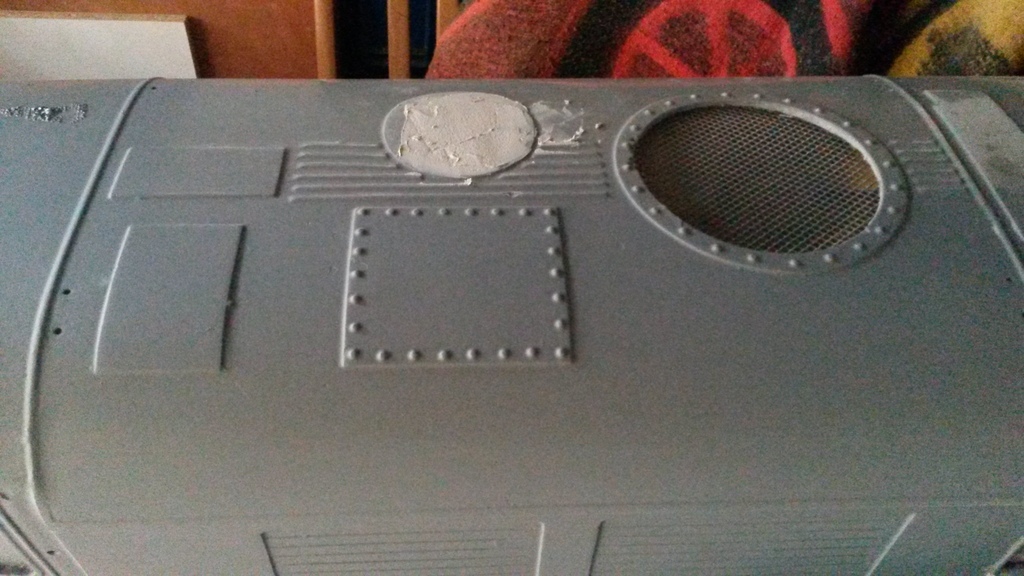 Next quick job was fill and smooth over the steam heat boiler exhaust (which was way too small anyways) 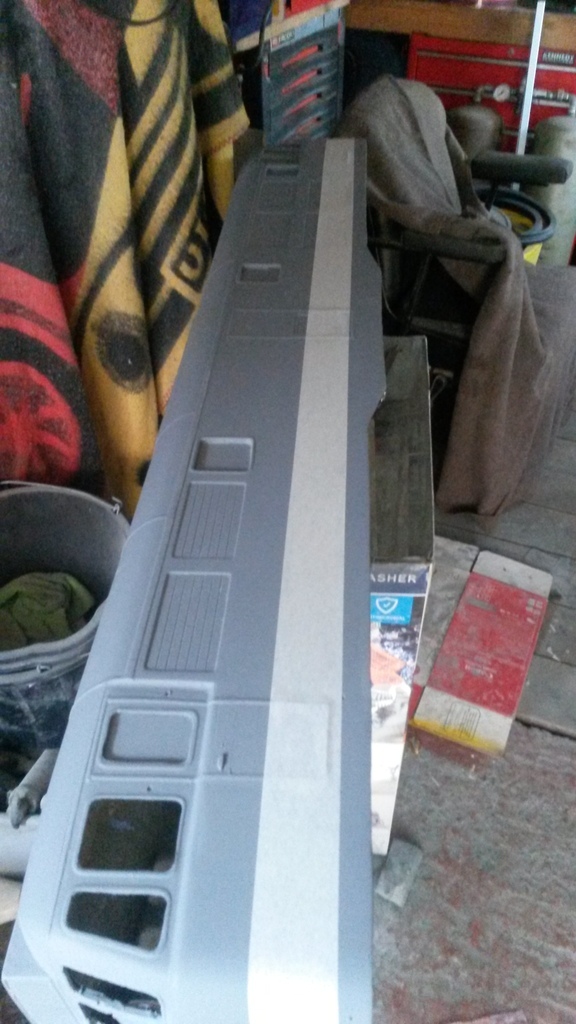 And then using some tape, draw a line along, what on the 12"/1' one is a bolted seam along the bodyshell. This would give me a baseline to assess what needed doing to the shell. |
| |
|
|
|
|
|
Mar 21, 2023 20:15:30 GMT
|
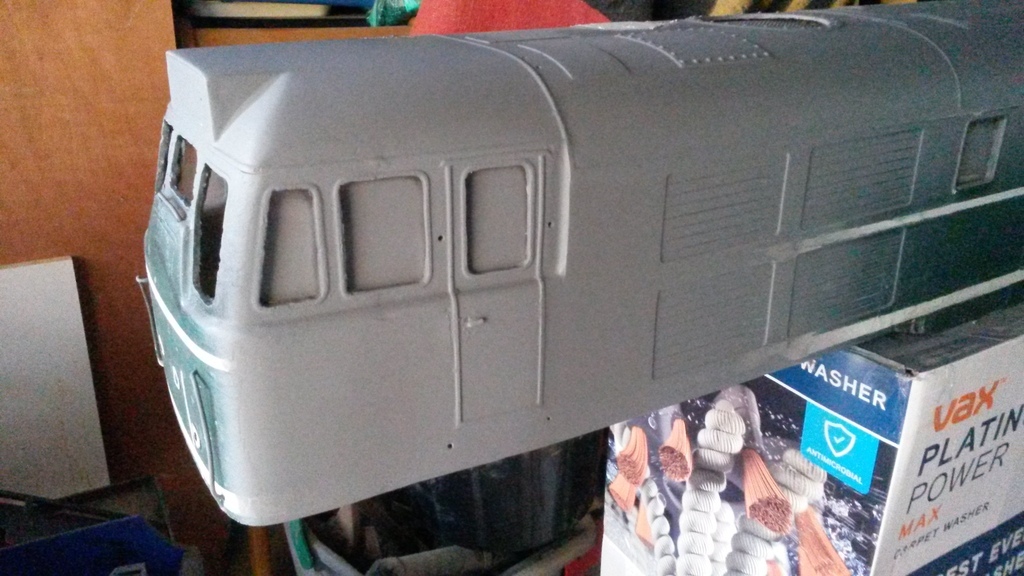
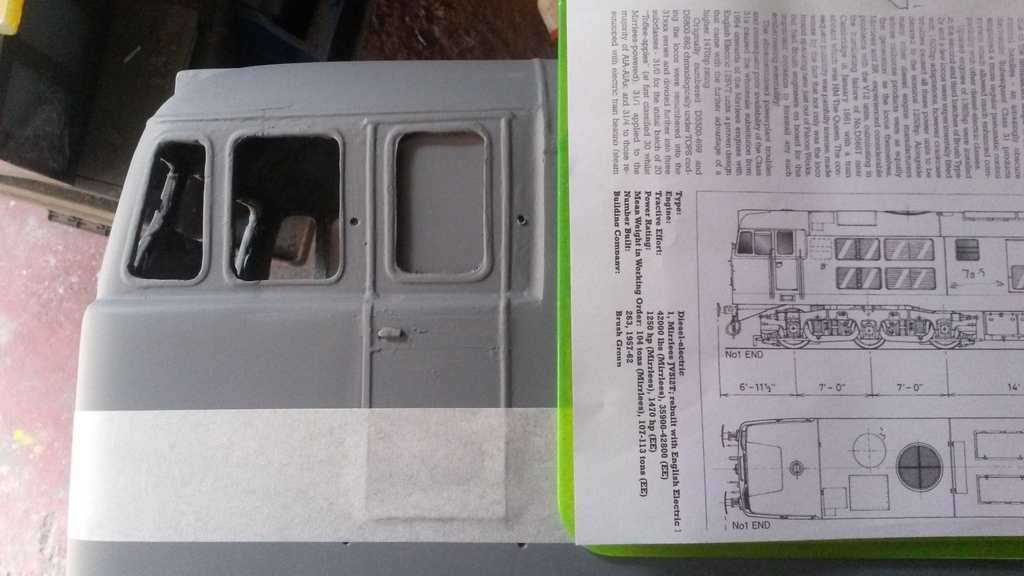 Firstly, using a scale drawing, I found the cab windows were a scale 5" too deep; but to change this would need a massive reworking of bodyside detail and this was going to be a 'quick' build, remember! 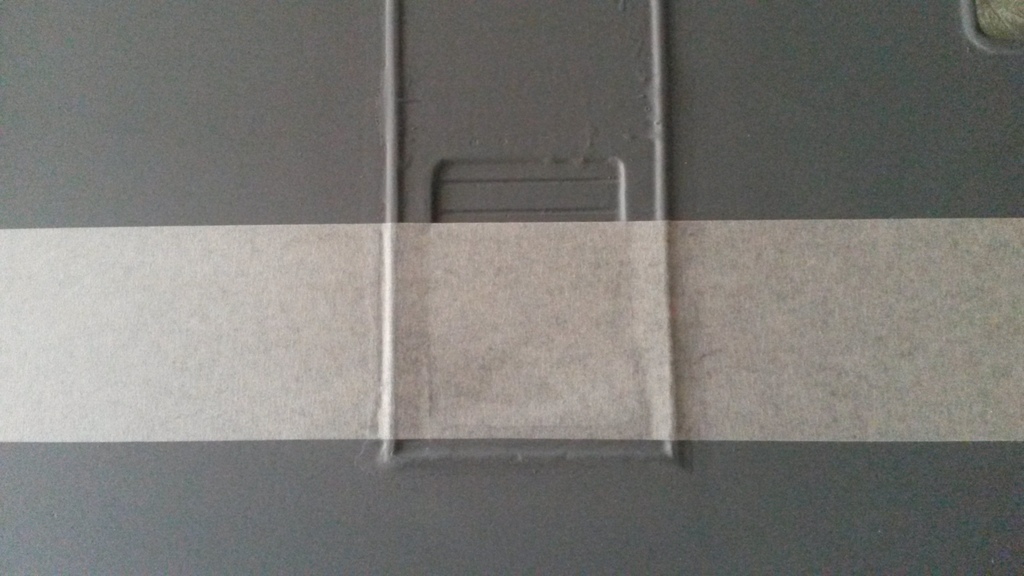 This was the only real other major annoyance - the engine room doors were too deep. 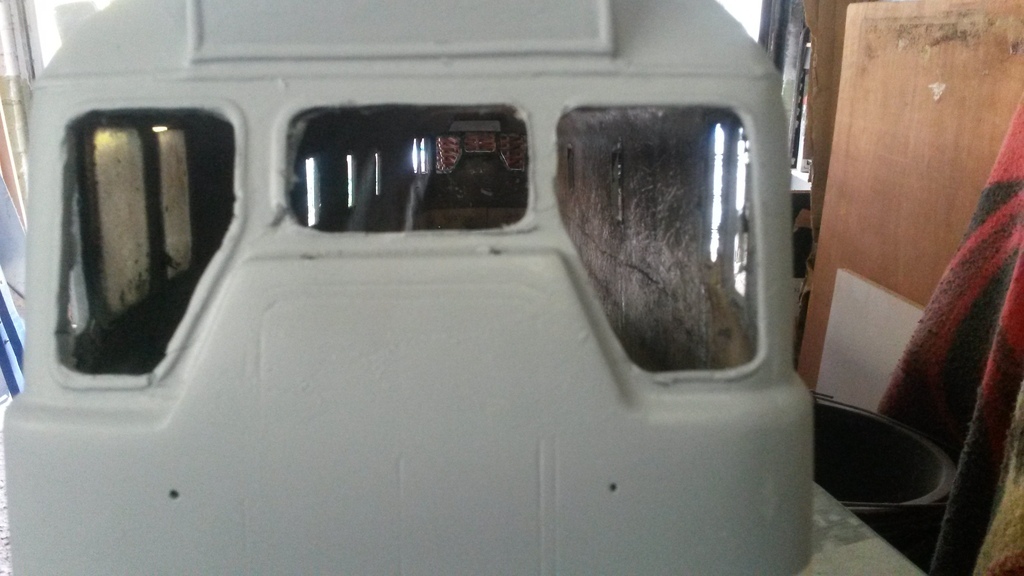 But this was a major problem on the ends - the cab windscreens were way too narrow and deep. After some head scratching, I took a deep breath, broke out the dremel and widened the windows, slimming down the pillars to make them finer. The original wndow size is on the left; the new cut one on the right. Not perfect but much, much better! |
| |
|
|
|
|
|
Mar 21, 2023 20:21:33 GMT
|
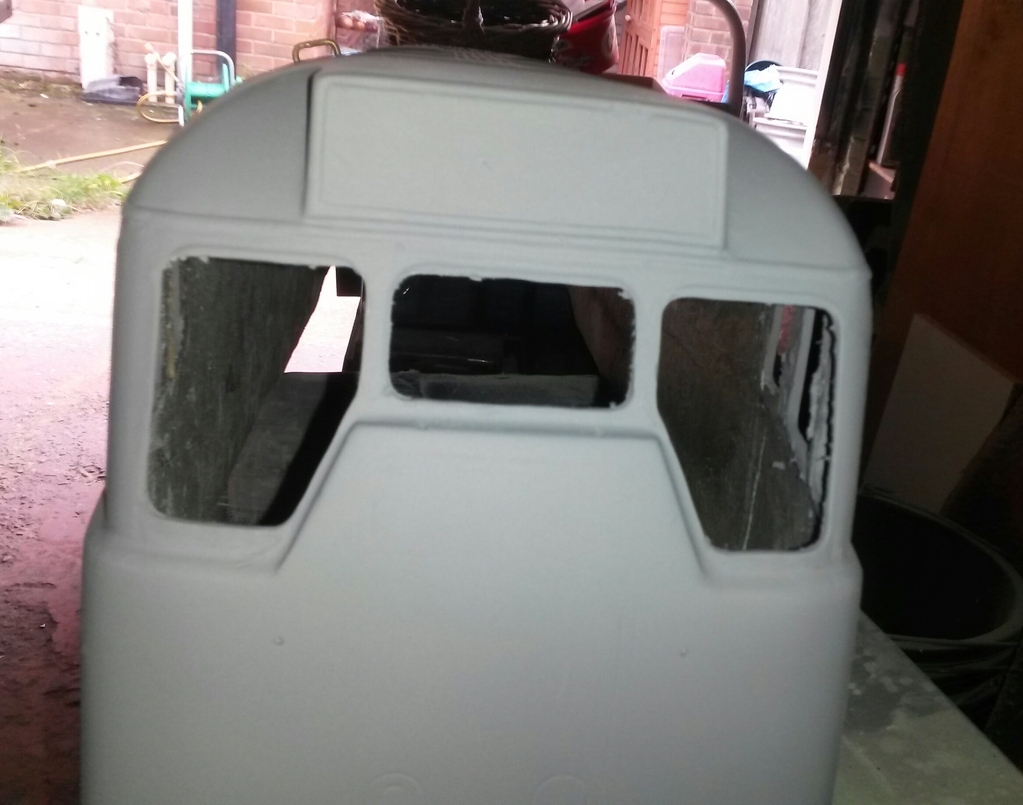 A couple more hours razzing away had the desired effect - the old 'dremel rash' cut windows looked more like the real thing. 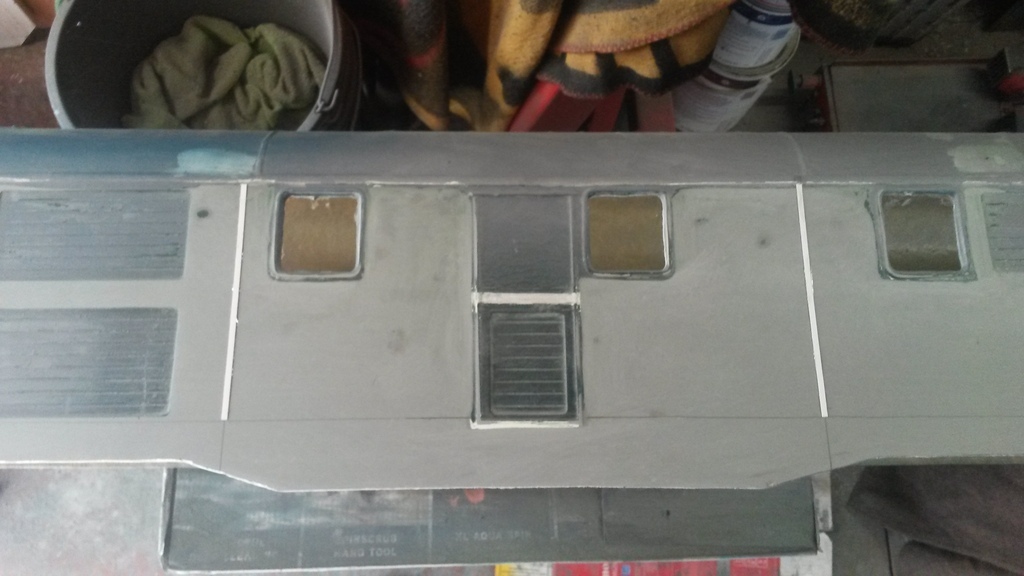 The body sides needed some seams fitting; the real ones have a massive load-bearing chassis and six bodyside panels that just bolt onto the frames, then the cabs and roof bolt to them. The two strips are the cover seams for the centre panel. 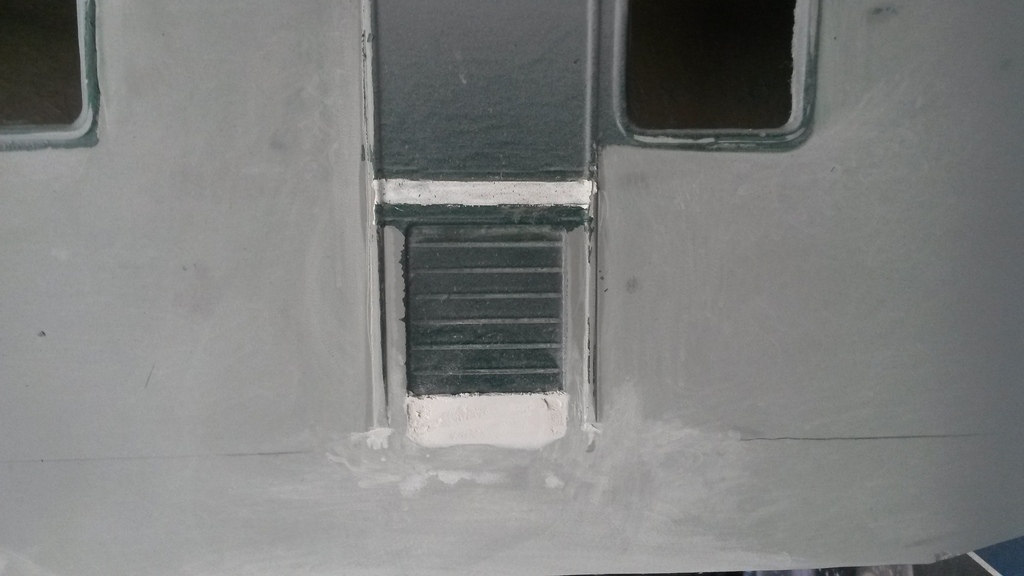 And then, using blutack and car filler, I shortened the engineroom doors to suit. |
| |
|
|
|
|
|
|
|
I don't know a lot about miniature railways other than our local village pitch/pub has a line running around the perimeter of the field with a station, turntable and sheds. I should think it's all 5" scale. Mixture of electric and steam runs. 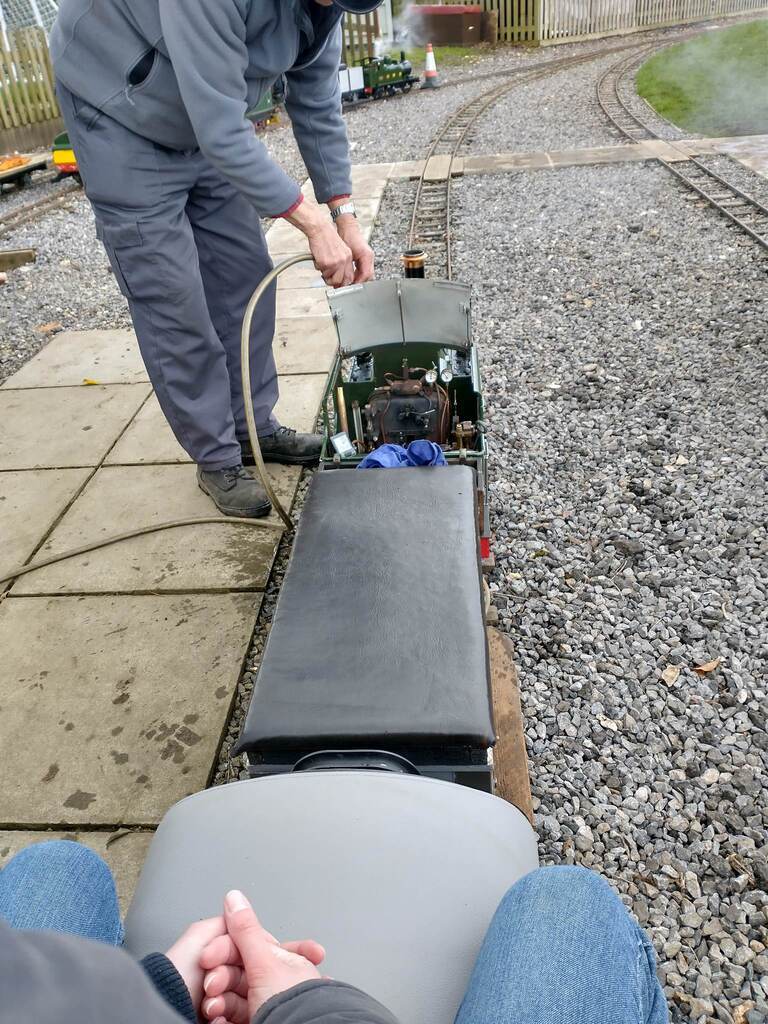 I should probably get in touch with the club so I can get to know how to work one and what's required to run it. Loving your attention to detail on this turn around so far! |
| |
|
|
|
|
|
May 27, 2023 20:01:22 GMT
|
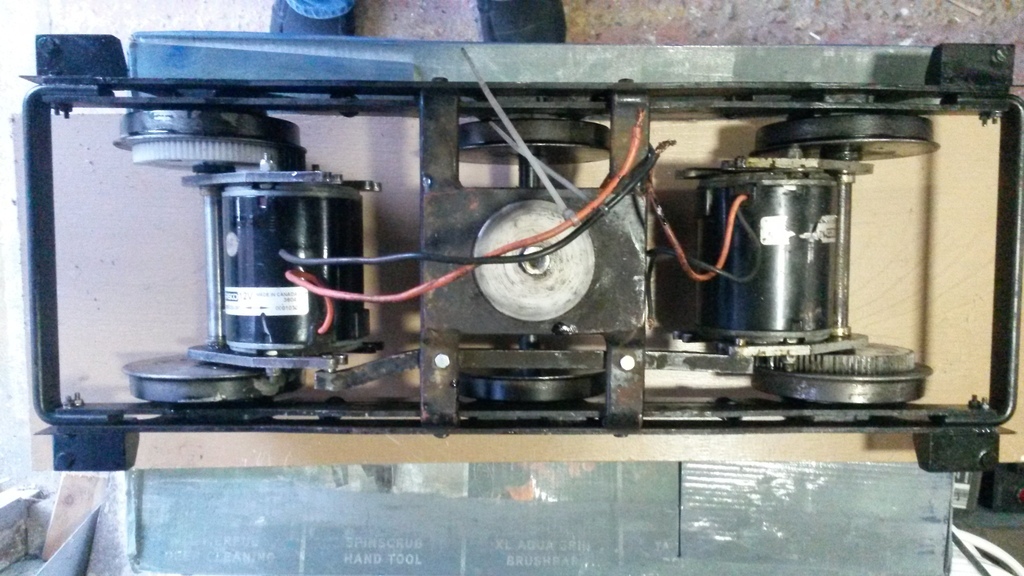
 Seeing as I was looking at making it a refurbished loco, the front connection doors were deleted and a sheet of steel added, so I smoothed off the front and added some 10"thou plasticard cut to 'door' shape at both ends. A but of a fiddle to fit to the end as it curves in two directions, but I got there... 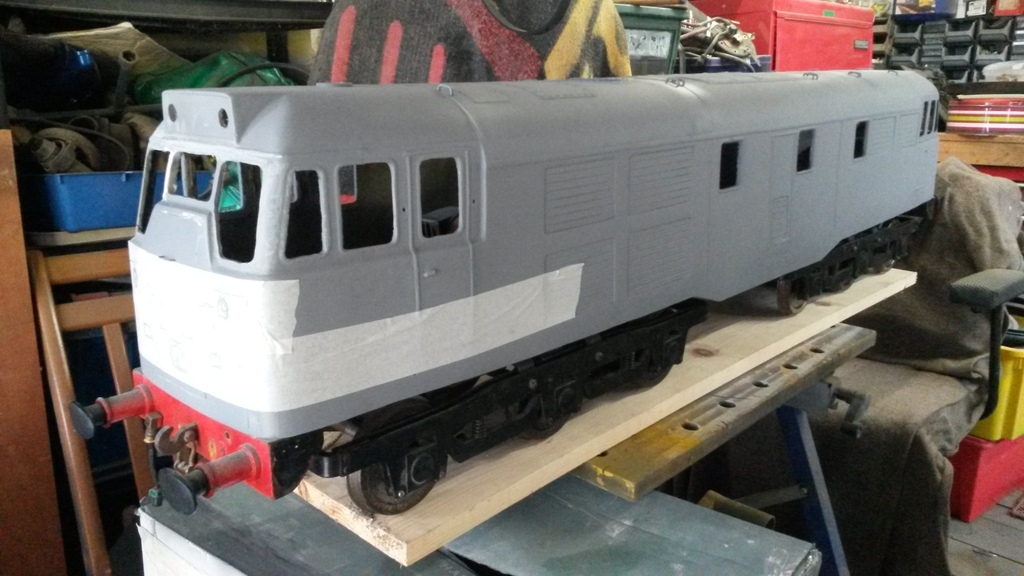 I also added the small handgrip to the front (to help lifting the real ones off) and then drilled out and fitted the roof hand grabs - these are 12mm wide, 2mm diameter brass bonded into holes in the roof. It added a bit of '3d' and helped make the loco look better. 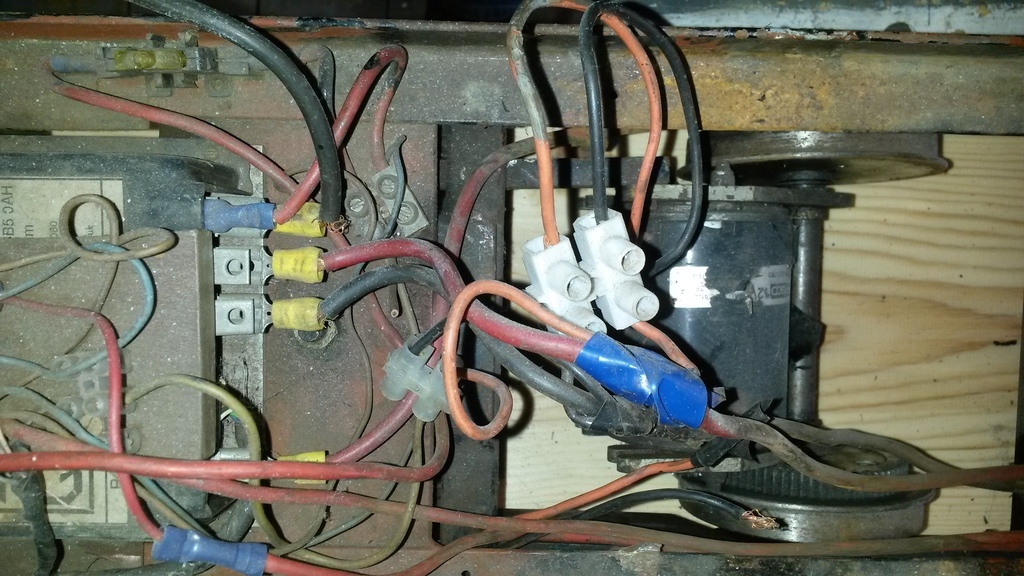 This rats nest is the wiring loom as it came. I took the executive decision to bin the darn lot and start from scratch using details for 4QD's website, so this lot was condemned to the copper recycling unit.... 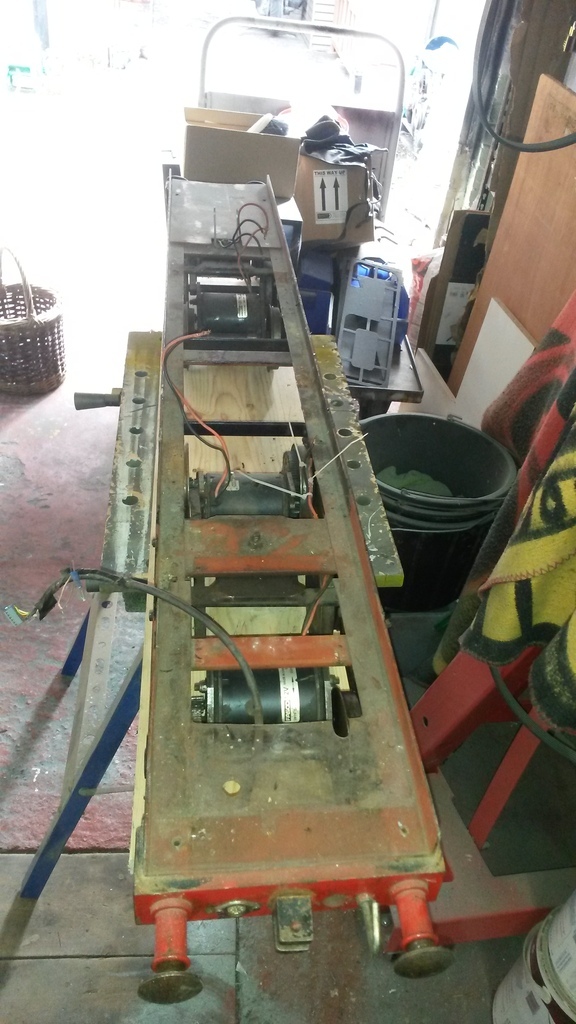 And with a nice, cleared chassis, I could lay it out how I wanted, not how someone with more enthusiasm than skill had it! |
| |
|
|
|
|
|
May 27, 2023 20:13:23 GMT
|
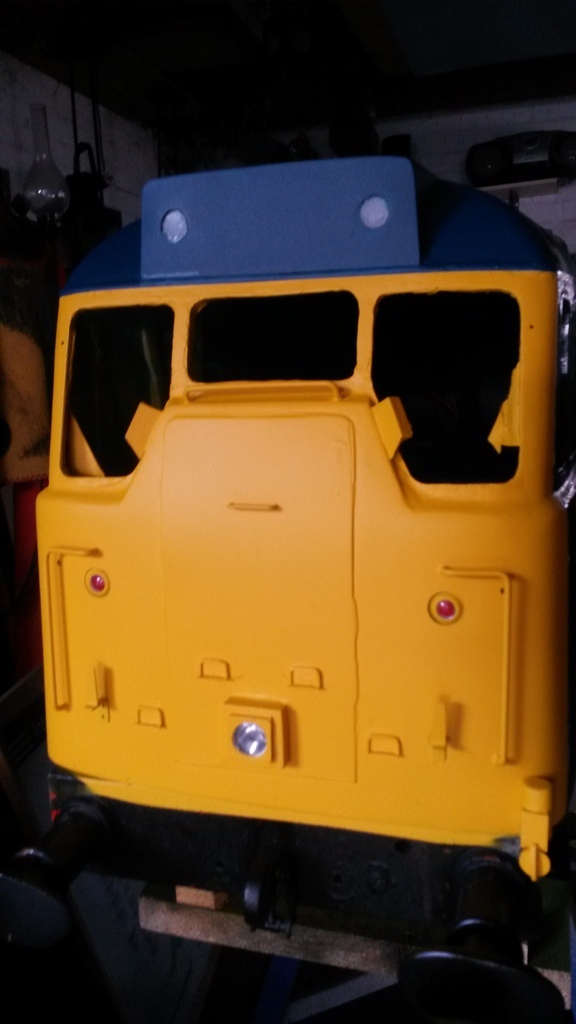
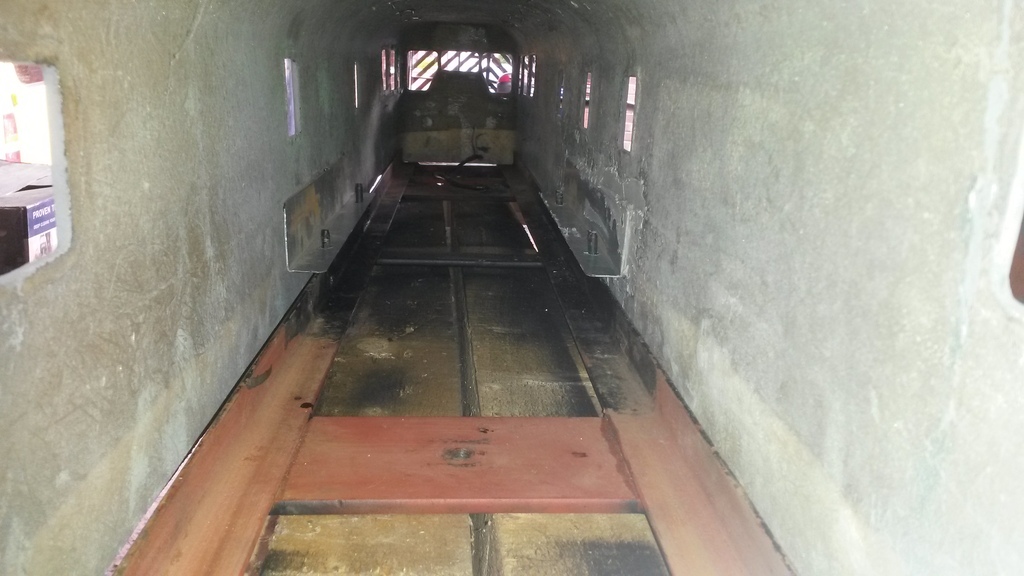 With the chassis stripped, I noticed the bodyshell bowed outwards in the middle, so I designed a clip mount method to hold the body in position more securely and hold it straight. Studs were welded to the outer edge of the chassis and galvanised angle drilled and bonded to the shell. Once set, this kept it all nice and straight. 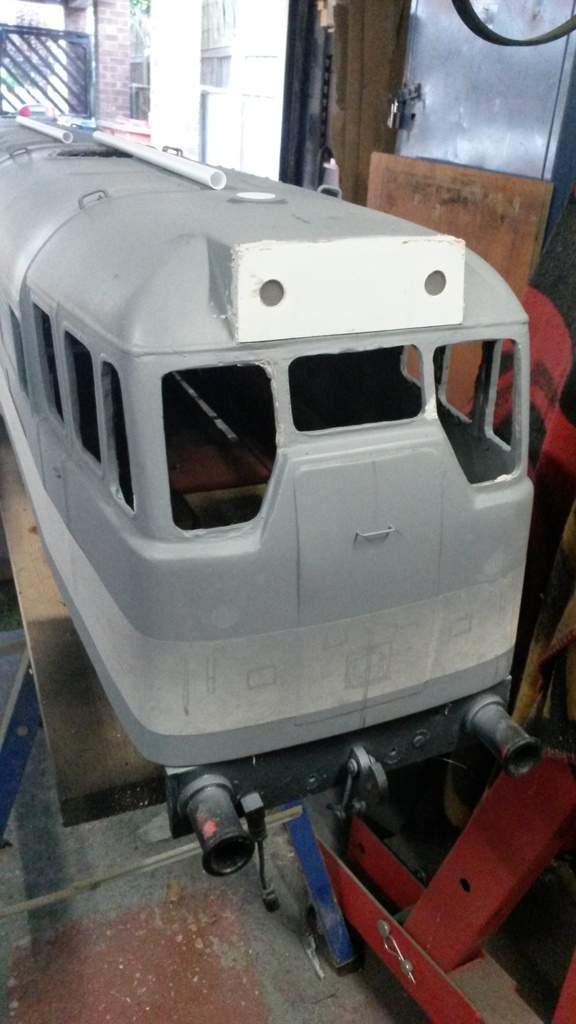 Works started on fitting out 'the face' of the loco whilst I waited for Mr Postie to deliver stuff - the headcode box was drilled out, a sheet of 'clear' plastic bonded on and finally the outer face to represent the sealed unit headcode. I roughly drew out stuff like steps, handrails and lights as because the shell isn't quite right, I would be working more on "that looks right" than scale sizes.The cab front windows were cut and smoothed to size and after a blast of primer, it actually didn't look too bad! 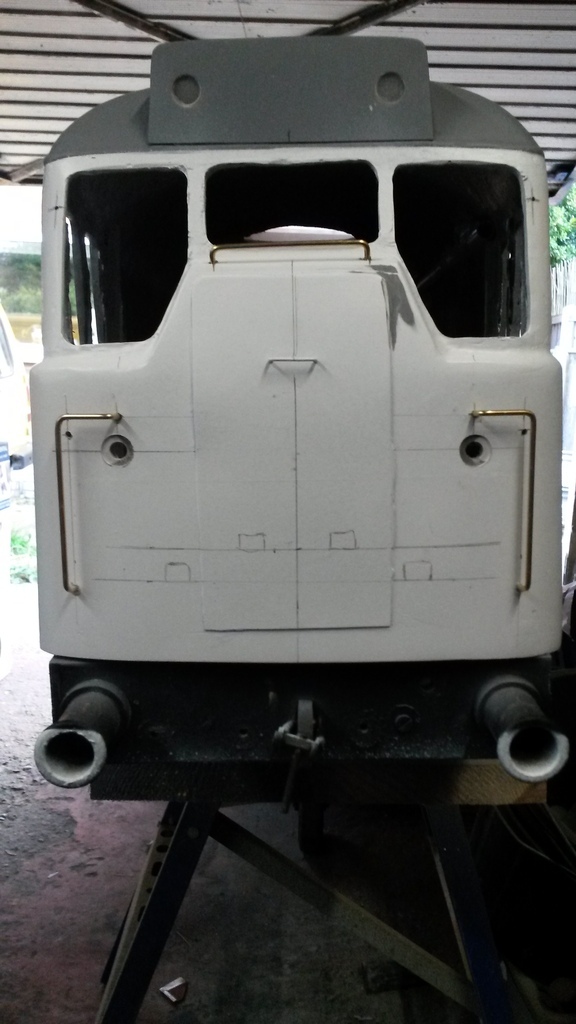 Progressing on, things like handrails and lights were marked out and 1mm holes drilled to make sure they 'sat right'. If they didn't, they were filled with car filler and redrilled. After some faffing about, the handrails went on and the 'face' started to come alive.... the holes below the cab handrails are for the tail lamps (red ones) and counter drilled to recess them a bit. |
| |
Last Edit: May 27, 2023 20:15:22 GMT by marinanut1
|
|
|
|
|
May 27, 2023 20:29:58 GMT
|
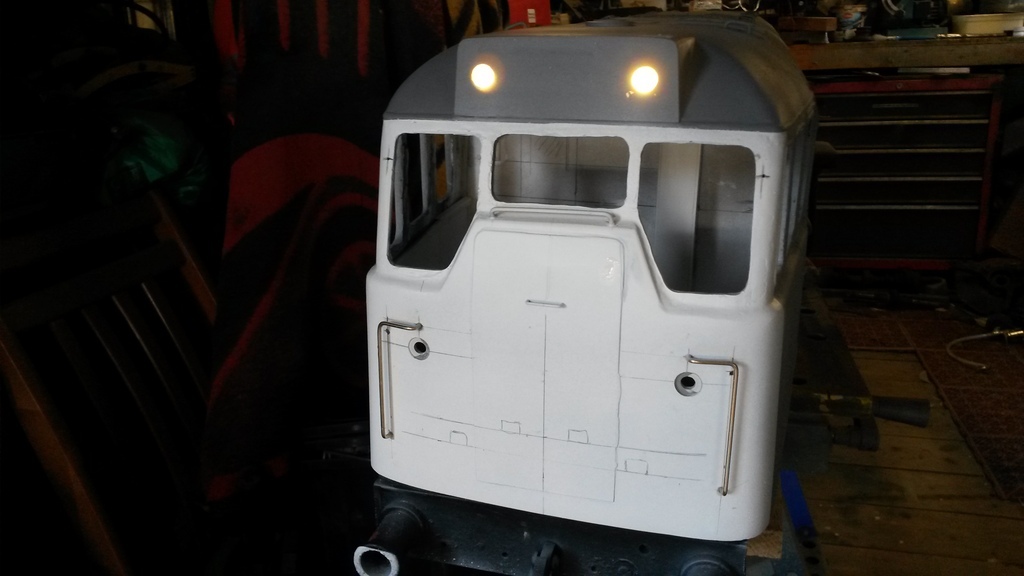 Whilst I was still waiting for bits to arrive, I fitted a tube the length of the body inside to run cables from the back (driving) cab to the front (leading) cab. The reason was I needed marker lights, a headlight and tail lamps, as well as interior cab lights and a couple of spare circuits. 6V LED strips and a box of plasticard soon had the headcode marker lights functional and "Zog" started to come alive... 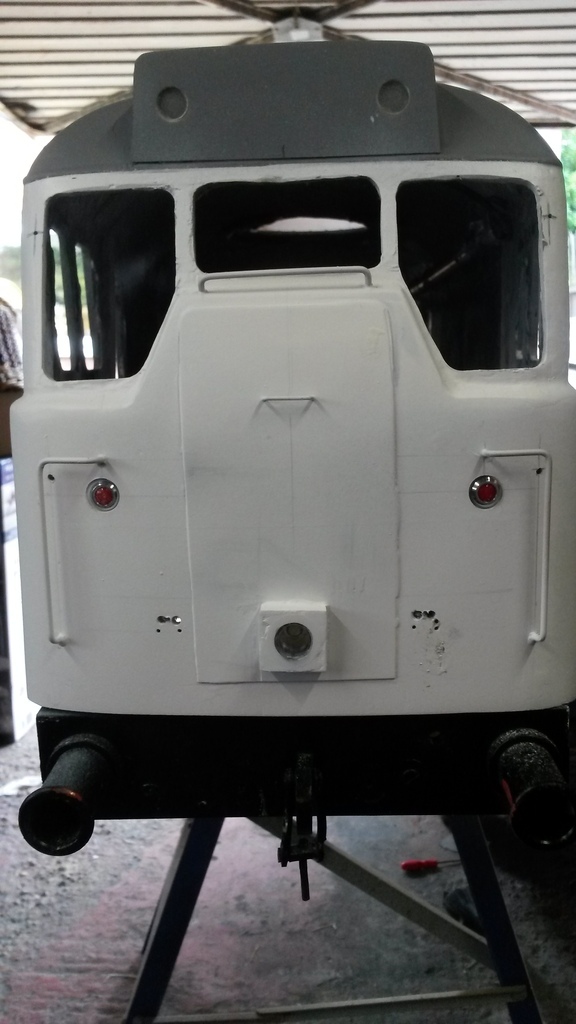 The headlight came from a cheap LED inspection torch which was quite powerful and luckily, was exactly the right diameter for representing the "Wipac Hairraiser" headlight. It was hacked about and fitted through a hole in the front, then a box fabricated around it and all bonded into place. I left the ability to unscrew it from the back and later on, boy was I glad I did! 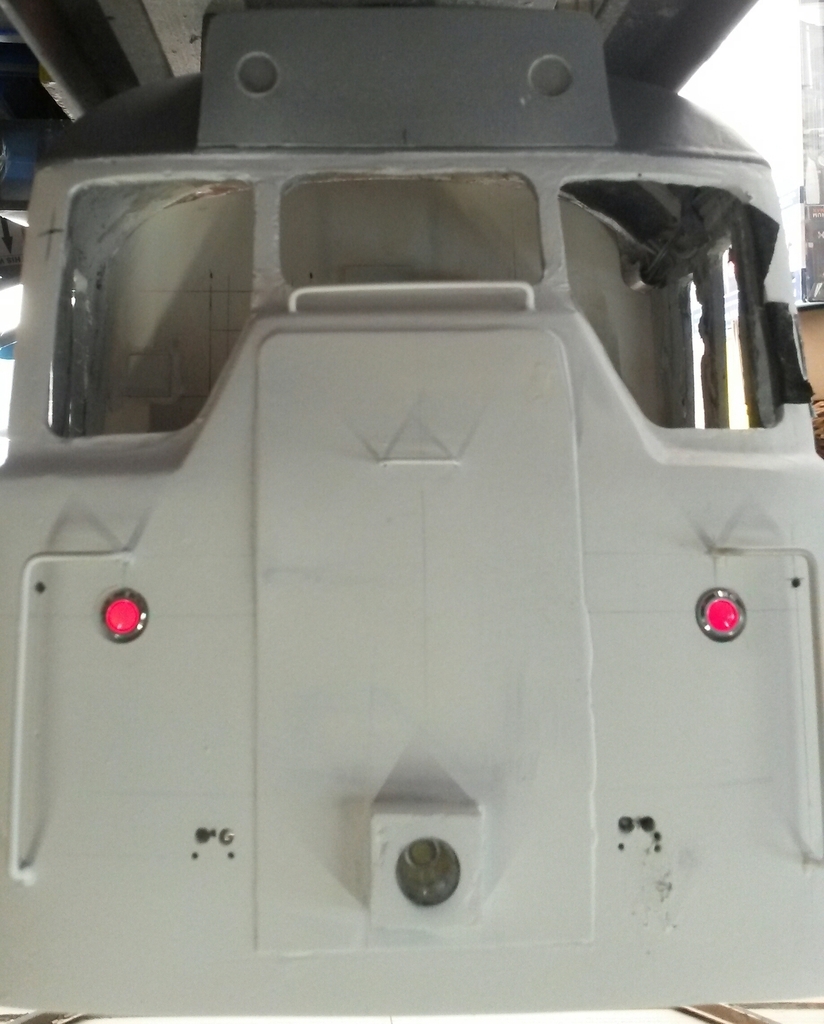 The LEDs for the tail lights finally arrived and I fitted them - nice metal 12V LED lamps of exactly the right diameter and frosted lenses - on 5v they glow satisfactorally like the real thing...... 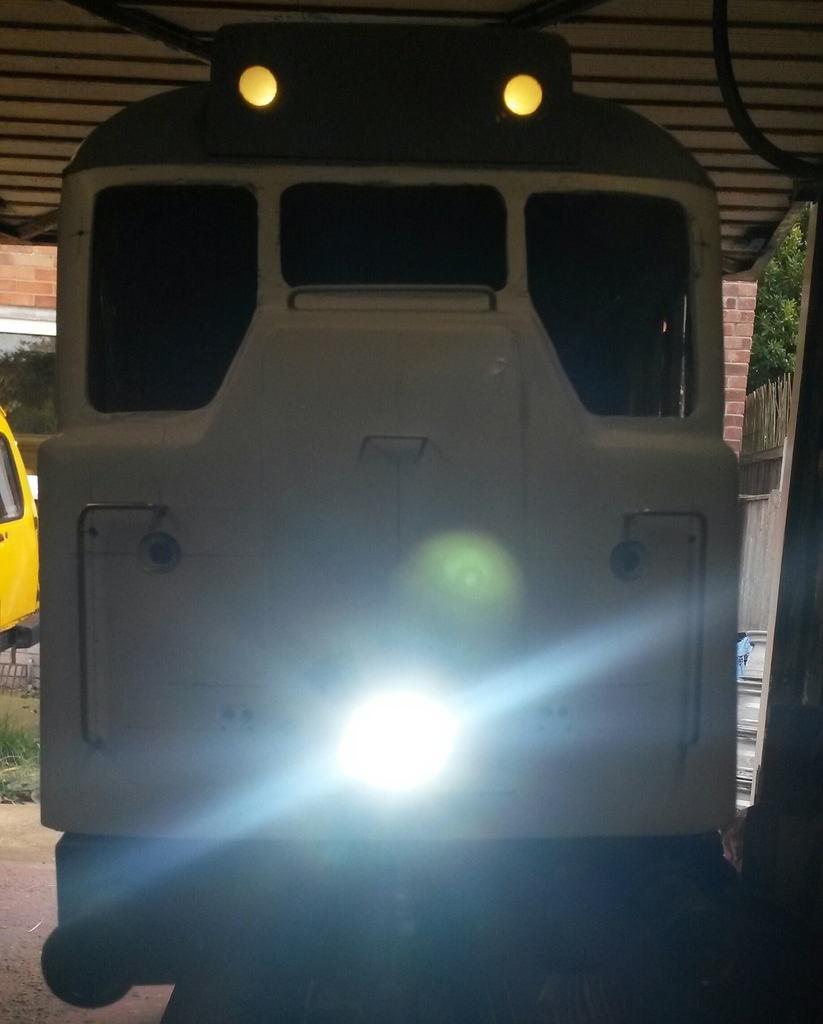 BOOM!!!!! Let There Be Light.... |
| |
|
|
|
|
|
|
|
|
|
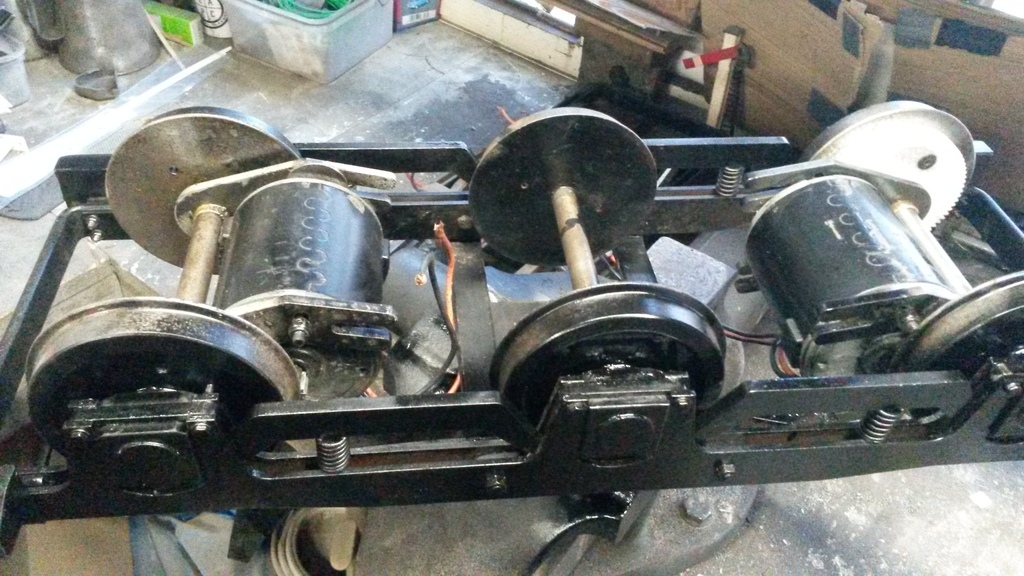 Well, part of the slight rebuild was to sort out the bogies. They have a proportional compensation suspension so all the weight is carried through the springs and equally spread to the wheels. Like the real thing, each bogie has two traction motors; in this case they are 24v dc truck wiper motors geared 80:1 with steel pinions and nylon drives, which gives a scale top speed of 96mph (real thing nominally 90mph.... although I have seen 105mph on a speedometer and still accelerating with a heavy passenger train on....). These bogies were a hotch-potch of odd bolt sizes so I decided on M3 (as they fitted) and replaced the lot with a standard size. One axlebox keep plate (the bit that stops the axlebox bearing dropping out) was a piece of bent brass, completely the wrong size so I fabricated a new one and worked on getting free movement throughout the drive system. One pinion/drive was utterly chewed up so I renewed it and one pinion had come adrift from the motor shaft .  |
| |
|
|
|
|
|
|
|
 A local-ish model emporium was advertising scale sandboxes for the bogies and seeing as the originals looked a but anemic compared to the prototype, I bought two sets and fitted them.They certainly filled the corners up but the bogies need brake cylinders and pipework fitting - that's probably next winter's task. 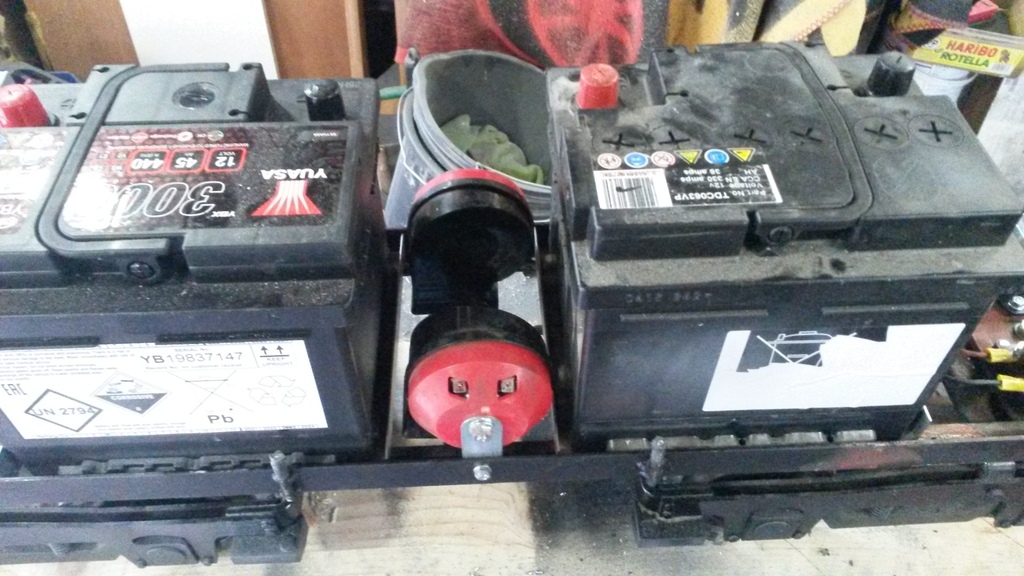 Now the bogies were ok, I returned to the chassis which I'd stripped down. Two 063 car batteries are the motive power and to help weight distribution (and access for wiring - it is a very 'tight' bodyshell), I moved them outwards from the centreline of the frame to just over the inner ends of the bogies, which left room to fit the horns (pathetic though they are). 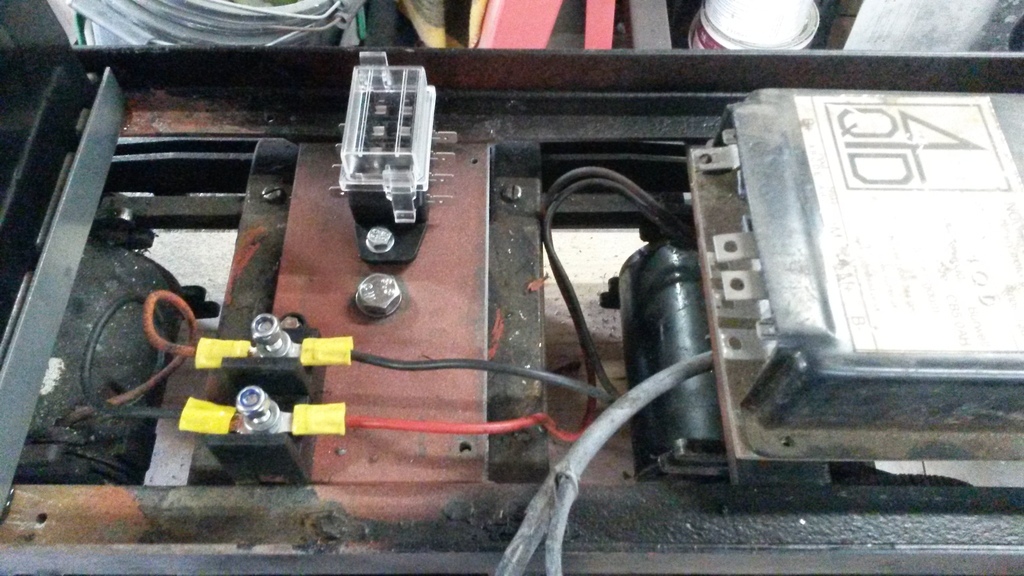 The 'driving' end has all the major bits in it - the 4QD drive unit, 12v distribution block, 5v converter for the lights and junction blocks for the 24v supply and drive systems. I made a galvanised tray for the 4QD to sit in to stop it getting wet on damp runs - I'm glad I did as the underside was filthy after its first test run. The old controller wasn't much good, neither were two others in the box of junk, so after finding out how comparatively cheap a new controller and wiring loom were, I junked the old stuff and fitted new. 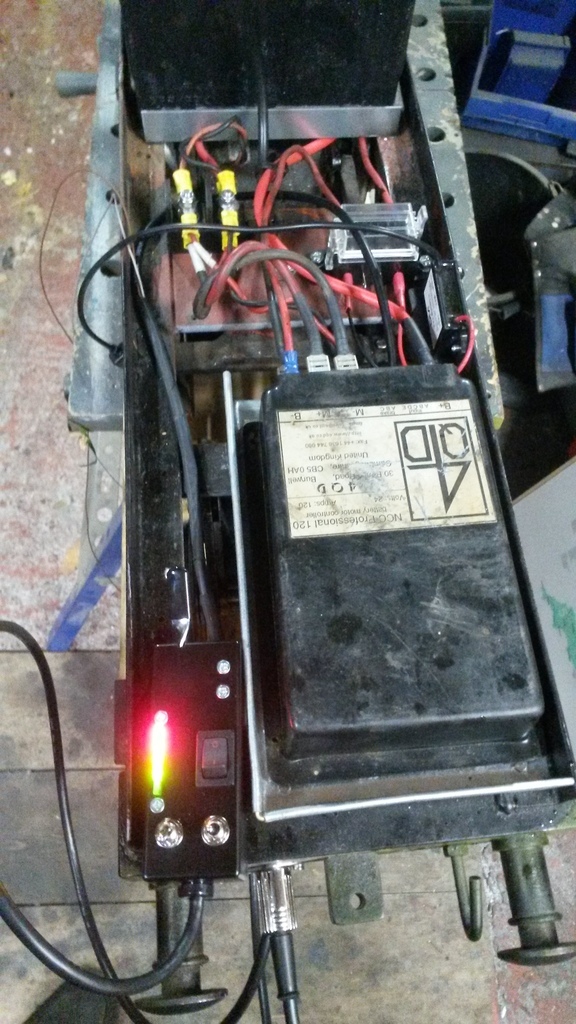 |
| |
|
|
|
|
|
|
|
|
Cool.
What paint job is it gonna get?
😃
|
| |
|
|
|
|
|
|
|
Cool. What paint job is it gonna get? 😃 A-Ha!!! All will be revealed soon! |
| |
|
|
|
|
|
|
|
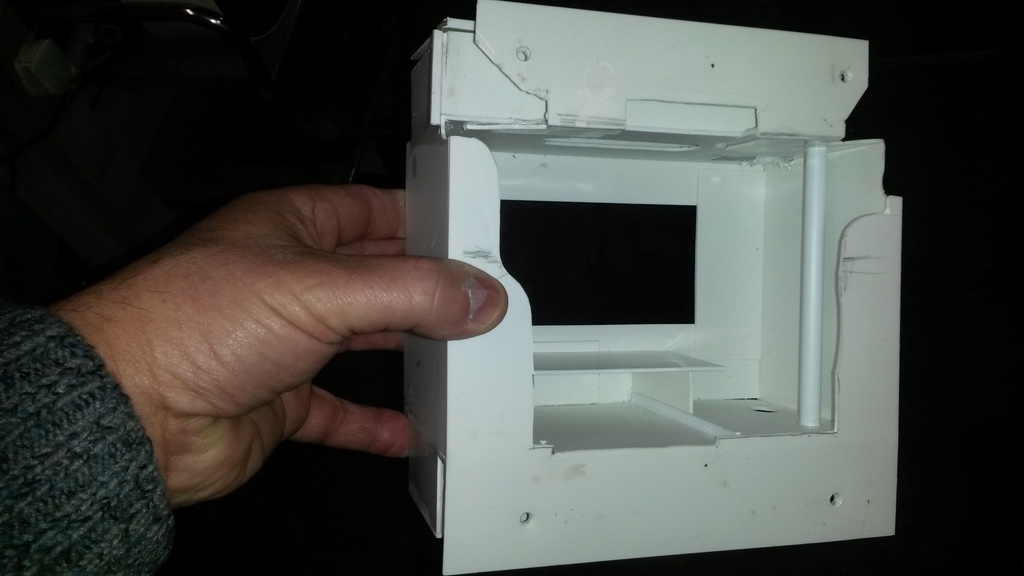
 Time for some more body fiddling - the exhausts had to be sorted out first. The original shell moulding was copied from the old Tri-Ang Type 2 model (hence the wrong windows etc) and had the original Mirrlees-style exhausts which were almost square but in line with the roof.Seeing as the whole fleet were fitted with English Electric engines in the late 1960's, the original style were nowhere near the EE style, so after sanding and filling the mouldings, I made up two EE style exhausts and cut through the roof, then bonded into position. 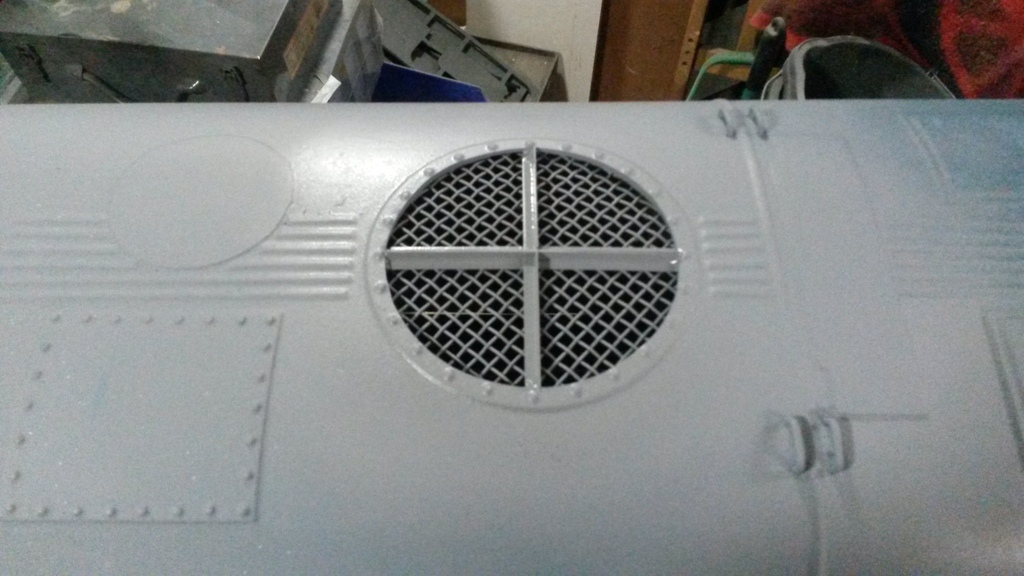 The rad fan grille was a horrid piece of ally mesh, really looked awful, so it got swapped out for a piece of stainless with the near-correct pitch after opening up the hole to a scale 4ft diameter. I fitted a cross-member as support...... then realised I'd coked up and had to change it.... 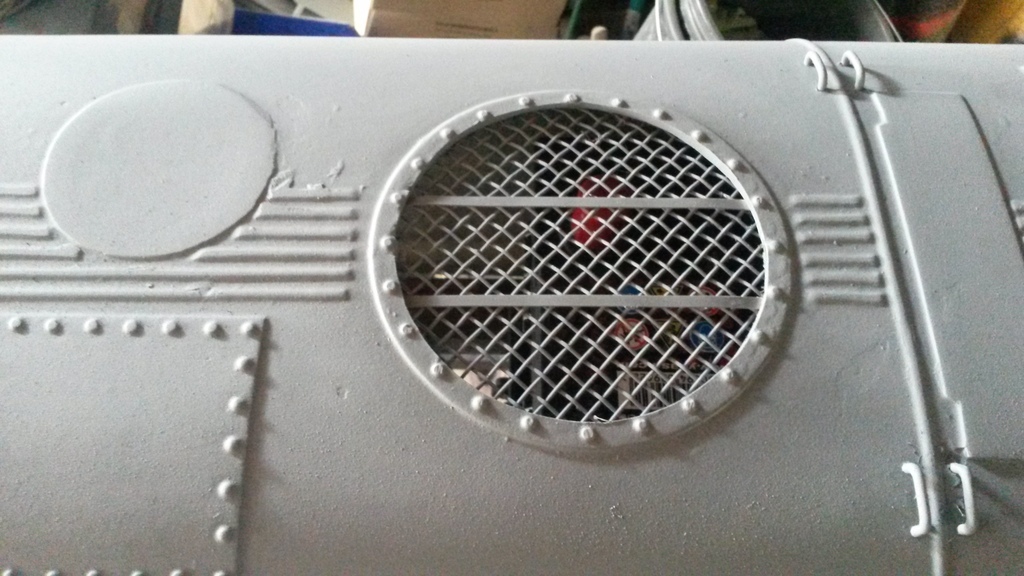 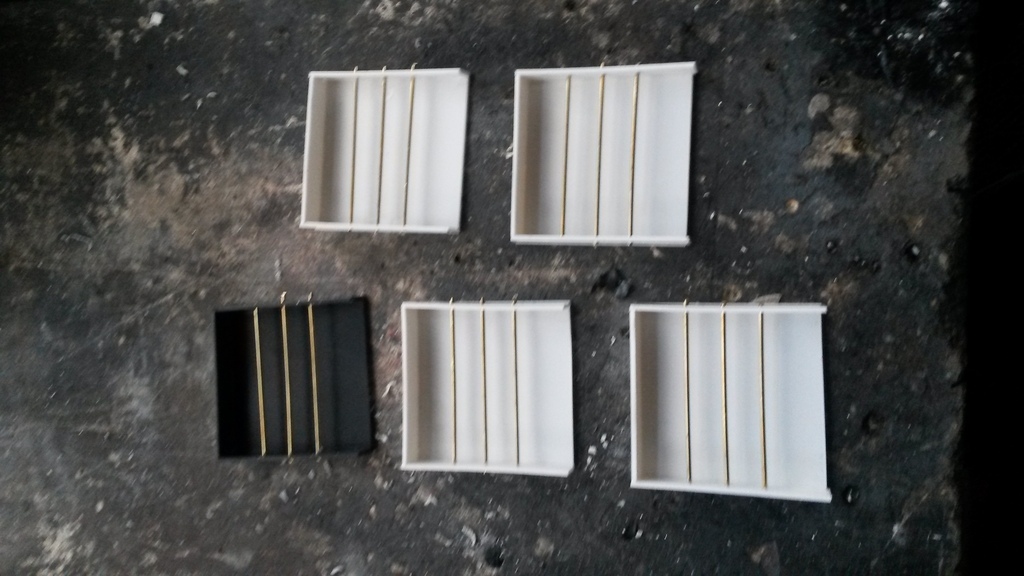 Now one thing with Class 31's is they were given big panoramic engineroom windows (ok, maybe an exaggeration..) so the interior bits were easily visible. I concocted a simple box, 10mm deep, to bond inside the shell and to carry the internal (and very visible) safety bars. The black one is the prototype. |
| |
|
|
|
|
|
|
|
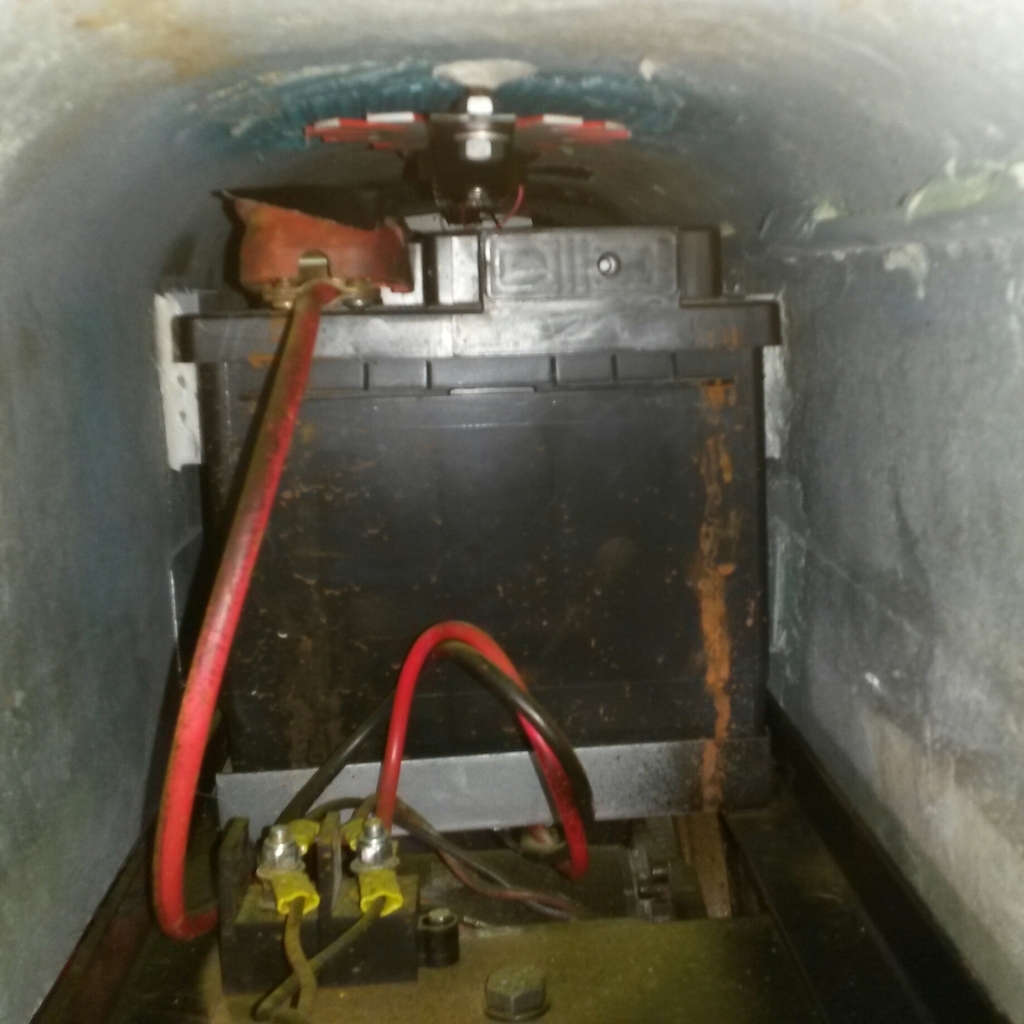 One thing I hadn't counted on was being able to look in through the rad fan grille and see the batteries and wiring - it needed a fan! A motorised fan!! But, as you can see, there isn't much room in there, so I had a hunt about and found an upgrade kit for old Hornby and LIMA 'Ringfield'type motors which had a 3d printed support and a nearly flat motor. After making a 'rough' fan from plasticard, I fitted it up on a bracket and tried it... 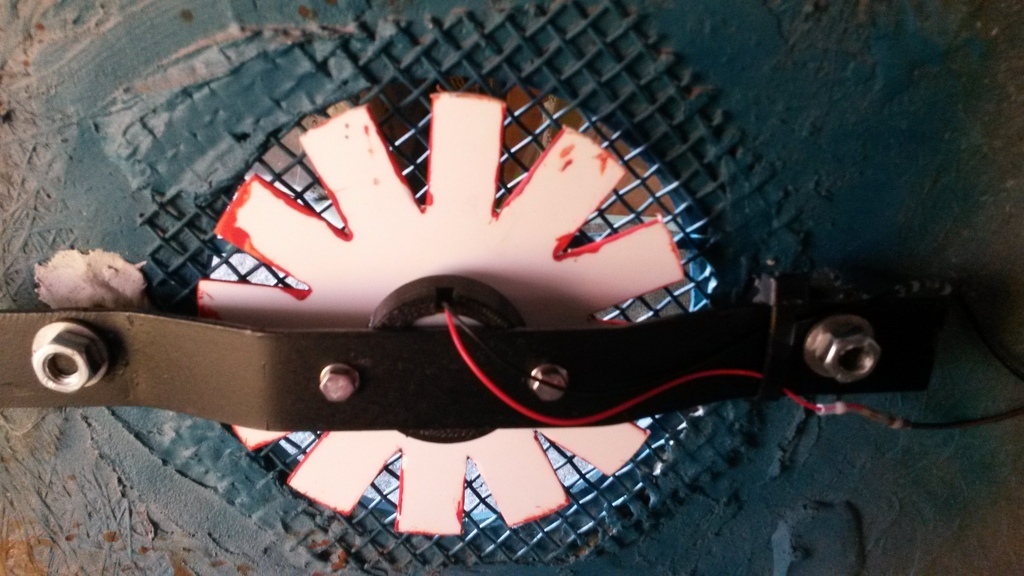 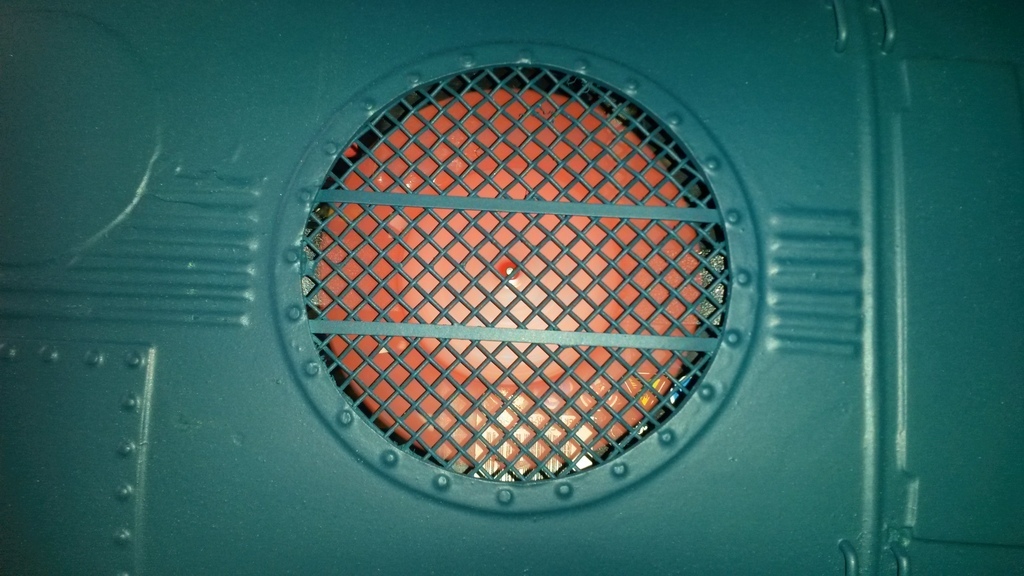 Even on 3.5v or 5v it roared around far too fast, so I found a cheap speed card online, fitted that an dreduced the speed to "Oh look, it's working!" speed... |
| |
|
|
|
|
|
|
|
 Now something else that annoyed the bejasus out of me was the lack of a fuel tank and battery boxes between the bogies, so after some measuring, I made one up from good old plasticard. One this this would do would be to act as a hide for the 80A 24v main breaker, but I'd need access for it, so after much head-scratching I made a 'door' disguised as one side of the battery box, with access through the side. Once it was all bolted in place, I accidentally 'stood' the loco on it with all the batteries on board; apart from a 'crack' as it took the weight, it survived intact! 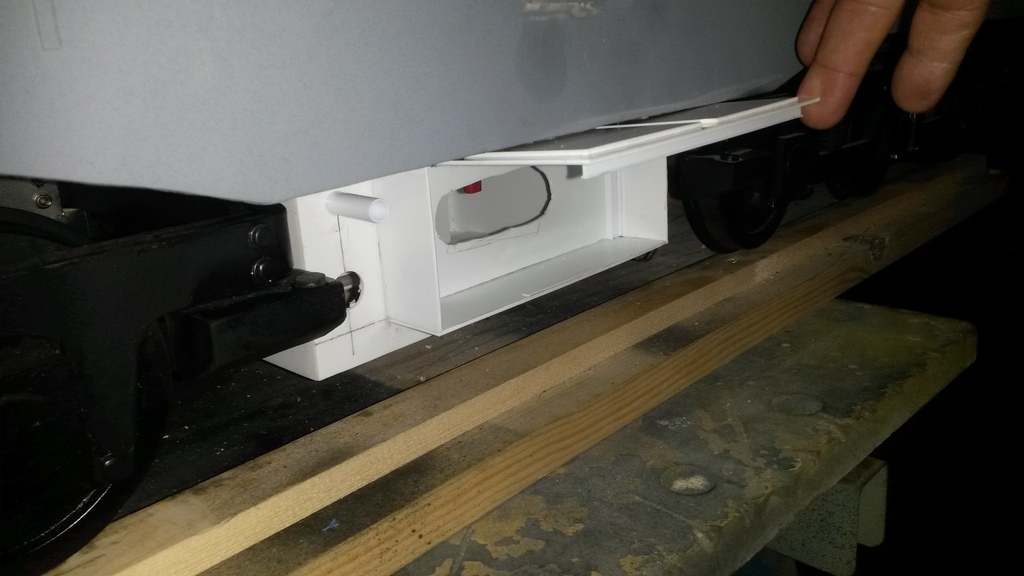 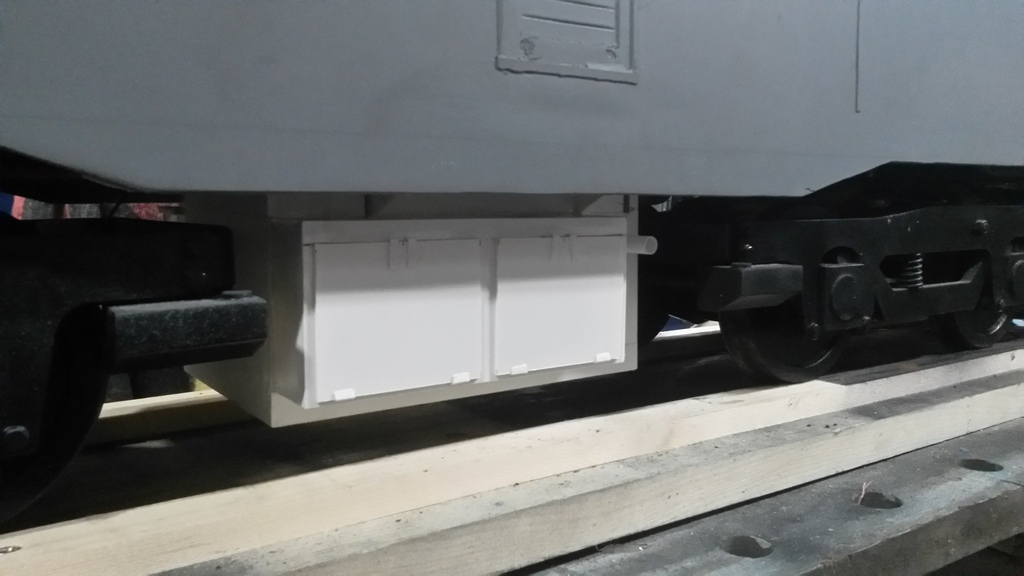 It had to come off again as I discovered in the Box Of Random Stuff, a 4QD Horn Control Board (HCB) which just happened, after some additional plasticarding, to fit neatly inside the battery box with the leads coming out straight to the horns! Result! 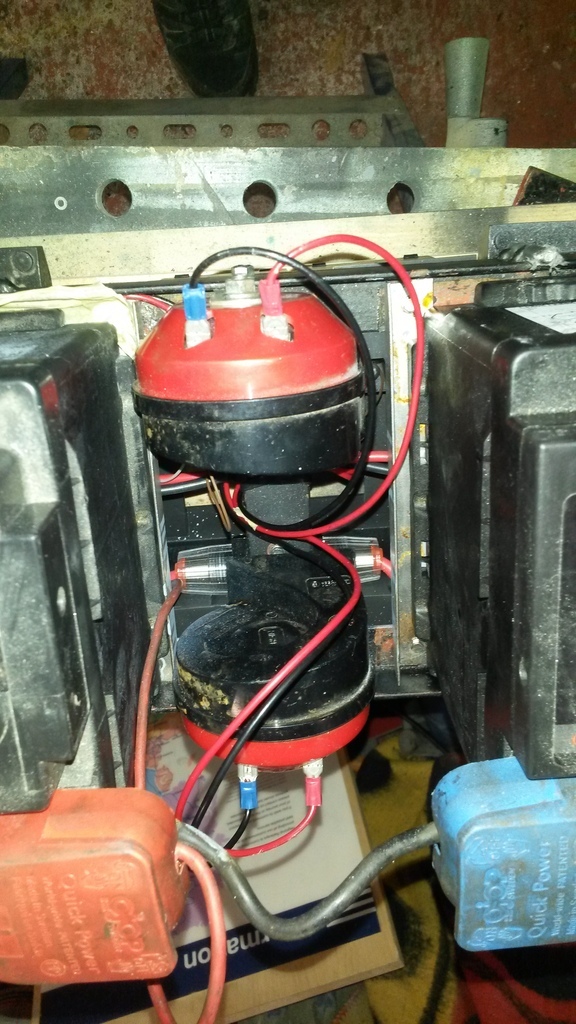 |
| |
|
|
|
|
|
|
|
|
Excellent work and it is looking so much better!! Well done on the work inside and outside.
|
| |
|
|
|
|
|
Jun 12, 2023 21:28:51 GMT
|
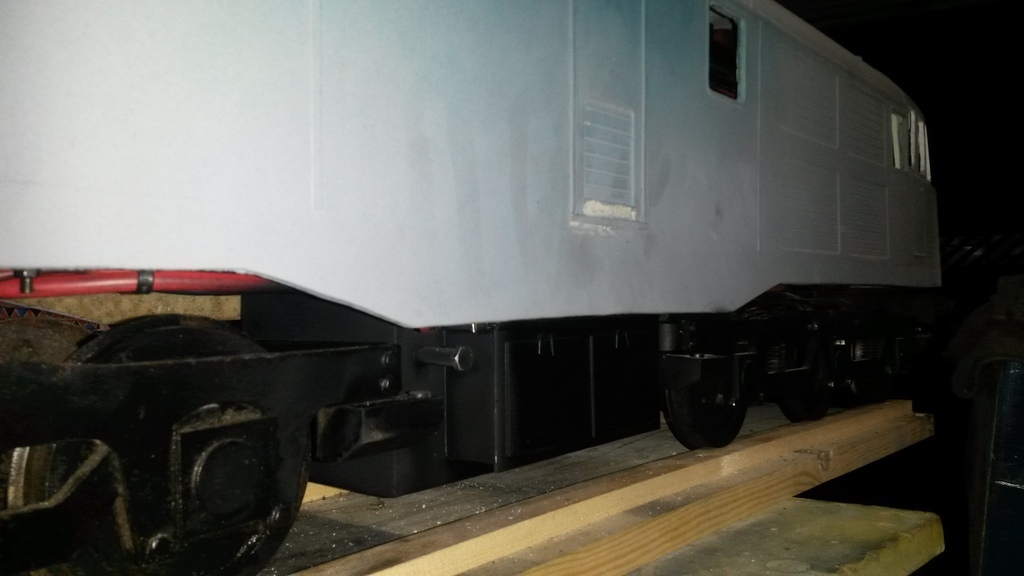 With the battery boxes finally in place and painted, final checks were carried out to make sure all wheels went the right way (they didn't - nothing swapping wires wouldn't cure) and it would actually fit on a 5" gauge track. It didn't. W.T.F?  ? One set of driving wheels would not sit in gauge, so reluctantly I stripped the bogie to discover someone had glued a wheel on and left a huge wodge of Loctite between the axle shoulder and the wheel itself. Stripped and reassembled, it all worked!  Final, final checks were carried out and then it was off to our local Model Engineering Society track for a test run. After borrowing a riding trolley, I put in quite a few laps, then let Vic have a go. The day could be classified as a success... 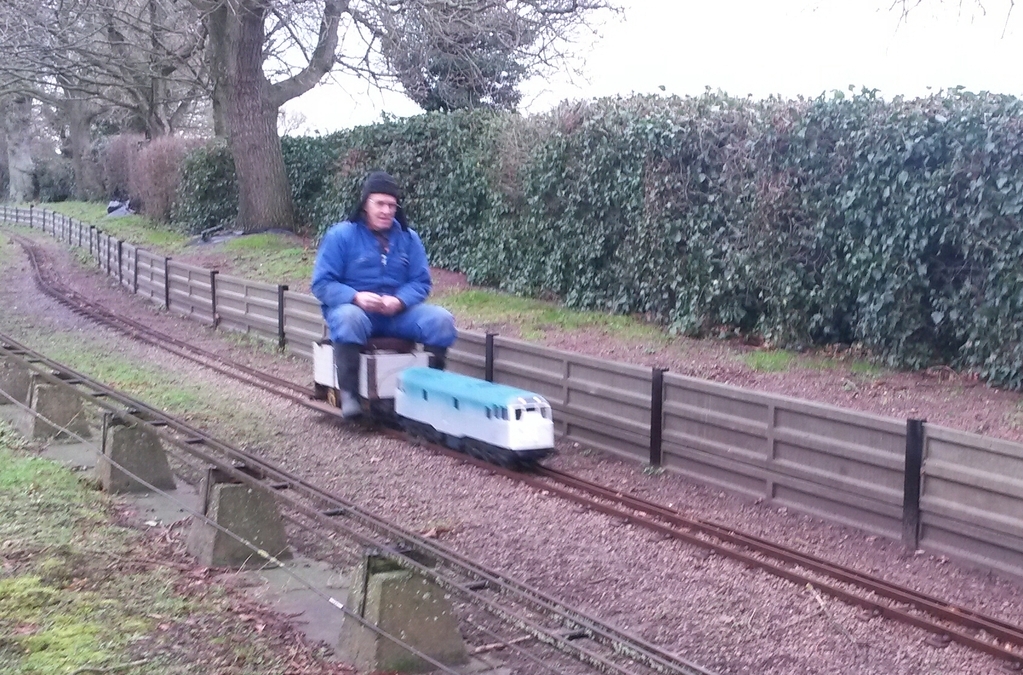 |
| |
|
|
|
|
|
Jun 13, 2023 14:50:41 GMT
|
 I couldn't put it off any longer - it worked (quite well) and was 'almost there', so the final stage was nigh - the final detail and paint. Using Railmatch prototype enamel colour paints, I layed on the chosen livery - BR "Banger Blue" from the early 1980's with full yellow ends and the orange cantrail stripe... 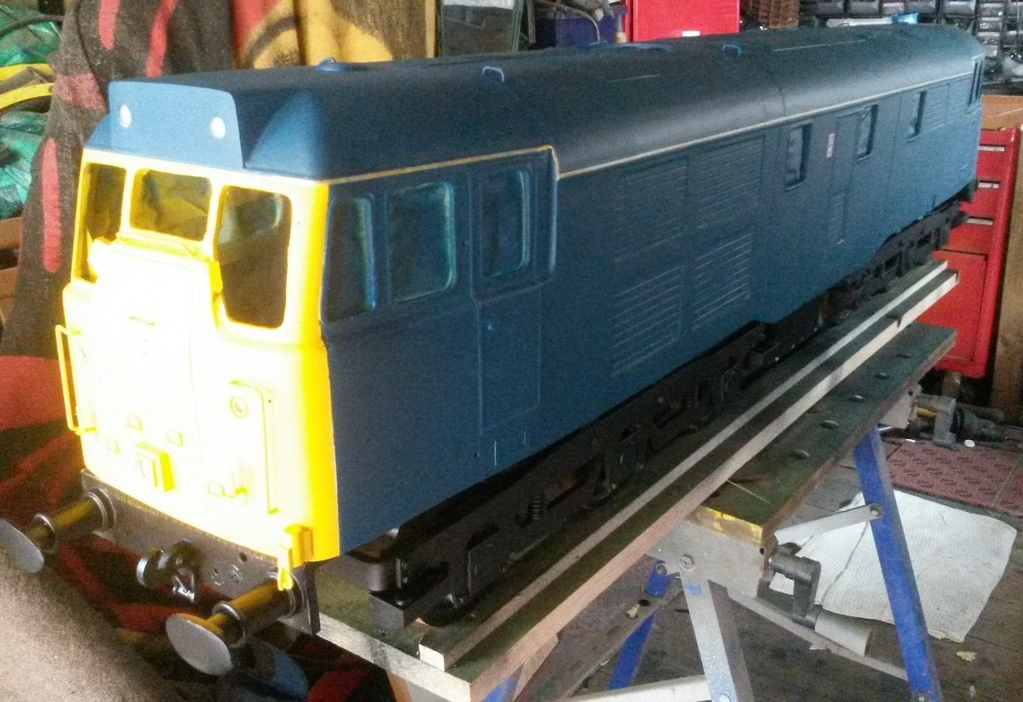 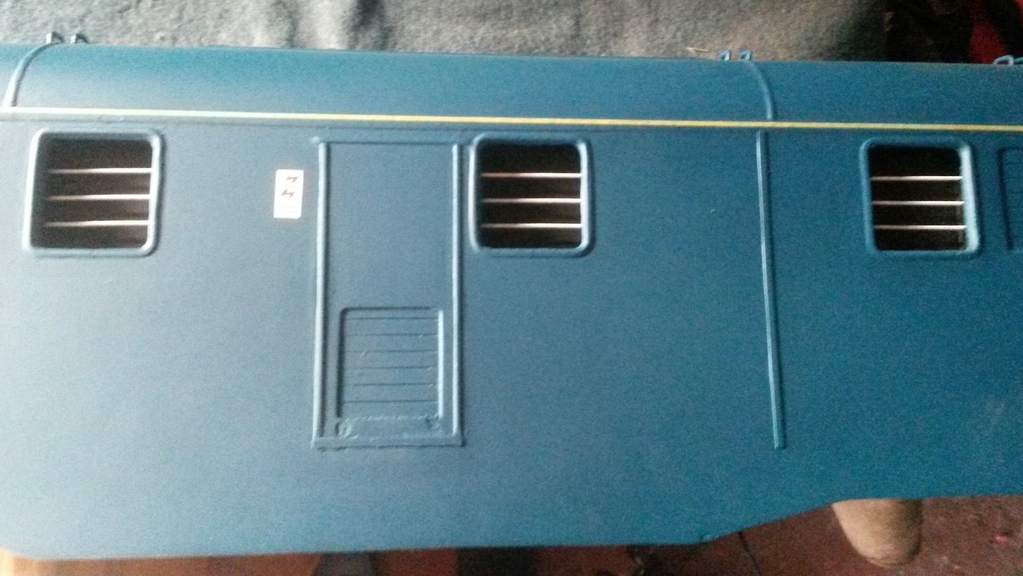 Once the basic colours were on and how I liked them, I fitted the engineroom window backings and the 1/12 scale 1970's-spec Overhead Electrification signs. 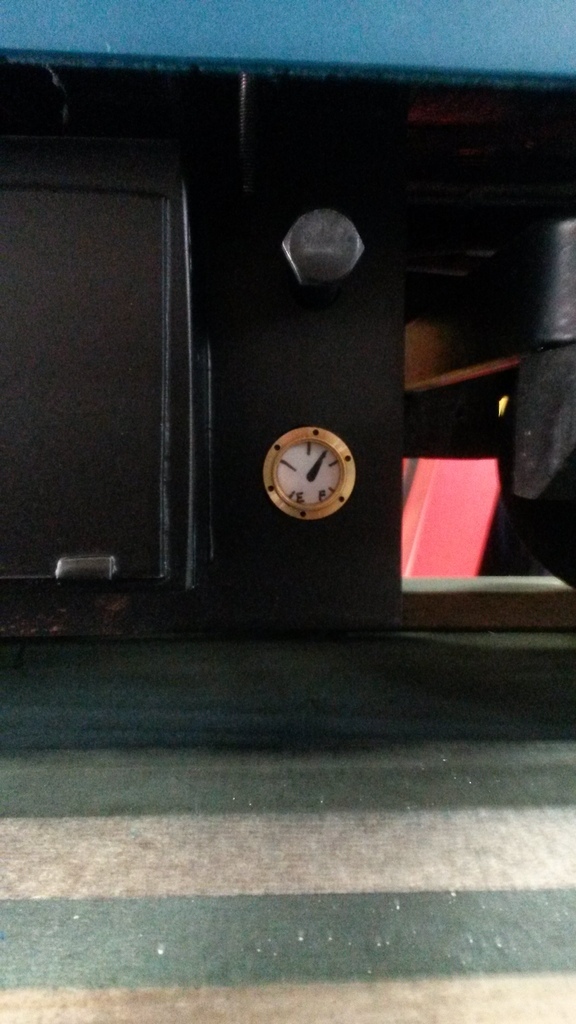 I fitted fuel gauges to the fuel tank - they are supposed to be sight glasses but they got covered in so much muck in real life they just disappeared, so nice brass gauges they shall be (actually model boat pre-glazed portholes) 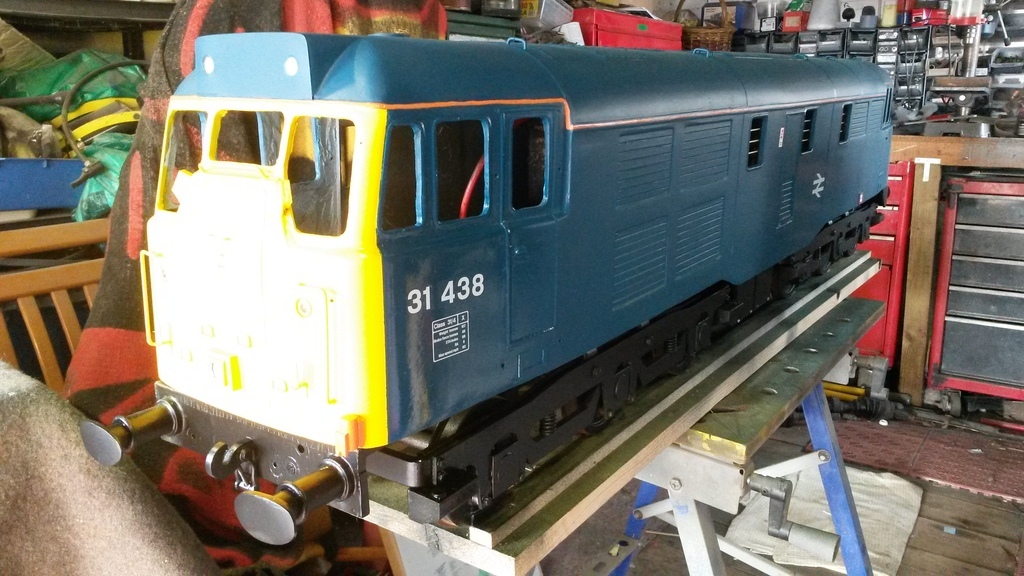 The orange stripe was being a right *^%$$"£$ to do until I found an orange enamel paint pen online, which made the whole job dead easy. In reality, this is a 19mm (3/4") wide tape stripe, so in this scale it is 1.5mm thick paint line. What it denotes is under 25kV electrification, you don't go above this line as there is a high chance of DEATH... The numbers were done specially for me by a transfer maker, as as the BR symbol on the side and the Data Panel. The whole lot was sealed in a good coat of satin varnish. |
| |
|
|
|
|


 ? One set of driving wheels would not sit in gauge, so reluctantly I stripped the bogie to discover someone had glued a wheel on and left a huge wodge of Loctite between the axle shoulder and the wheel itself. Stripped and reassembled, it all worked!